In today’s dynamic warehouse environments, the ability to create adaptable material handling pathways is essential for operational efficiency. Traditional flexible conveyor system designs often assume straight-line transfers, but real-world spaces rarely accommodate such linear simplicity. Columns, workstations, storage racks, and other infrastructure elements create obstacles that require conveyor lines to bend and navigate corners to maintain efficient workflow.

The challenge of creating conveyor routes that follow your facility’s unique layout—rather than forcing your facility to adapt to rigid conveyor limitations—is one that many warehouse managers face. Implementing a conveyor system that can effectively navigate corners and curves not only maximizes your available space but also creates more efficient pathways for material movement, reducing travel distances and handling time.
This article explores practical solutions for setting up flexible conveyor systems that can navigate corners and irregular paths, focusing on how to leverage Naili’s modular conveyor designs to create customized material flow that works with your space constraints rather than against them.
The Problem with Fixed Conveyors: When Your Workflow Needs to Bend
Traditional fixed conveyor systems present significant limitations when warehouse layouts require anything beyond straight-line material flow:
Inflexible Infrastructure Constraints
Fixed conveyor installations typically require:
- Permanent mounting to floors or ceiling structures
- Custom-fabricated curved sections for each turn
- Specialized engineering for each installation
- Significant lead time for design and manufacturing
- Expensive modification costs when layout needs change
- Dedicated electrical infrastructure at specific points
These rigid constraints force operations to adapt their workflows and space utilization around the conveyor system rather than allowing the material handling solution to adapt to operational needs.
Evolving Operational Needs
Modern warehouses face constantly changing requirements:
- Seasonal inventory fluctuations demand different storage configurations
- New product lines may require unique handling paths
- Changing order profiles might necessitate workflow adjustments
- Temporary promotions or projects need flexible solutions
- Facility expansions or relocations require adaptable equipment
When operations change but your conveyor system can’t adapt, productivity suffers and unnecessary handling steps are introduced to compensate for inflexible infrastructure.
Space Utilization Challenges
Fixed corner conveyors typically consume excessive space:
- Curve sections require large turning radii
- Fixed curved conveyors create “dead zones” of unusable space
- Permanent installations prevent flexible use of floor space
- Building columns and obstacles create routing challenges
- Straight-line systems may need to travel unnecessarily long paths
The inability to create tight turns and adaptable paths means traditional systems often take circuitous routes, wasting valuable floor space and increasing travel distances.
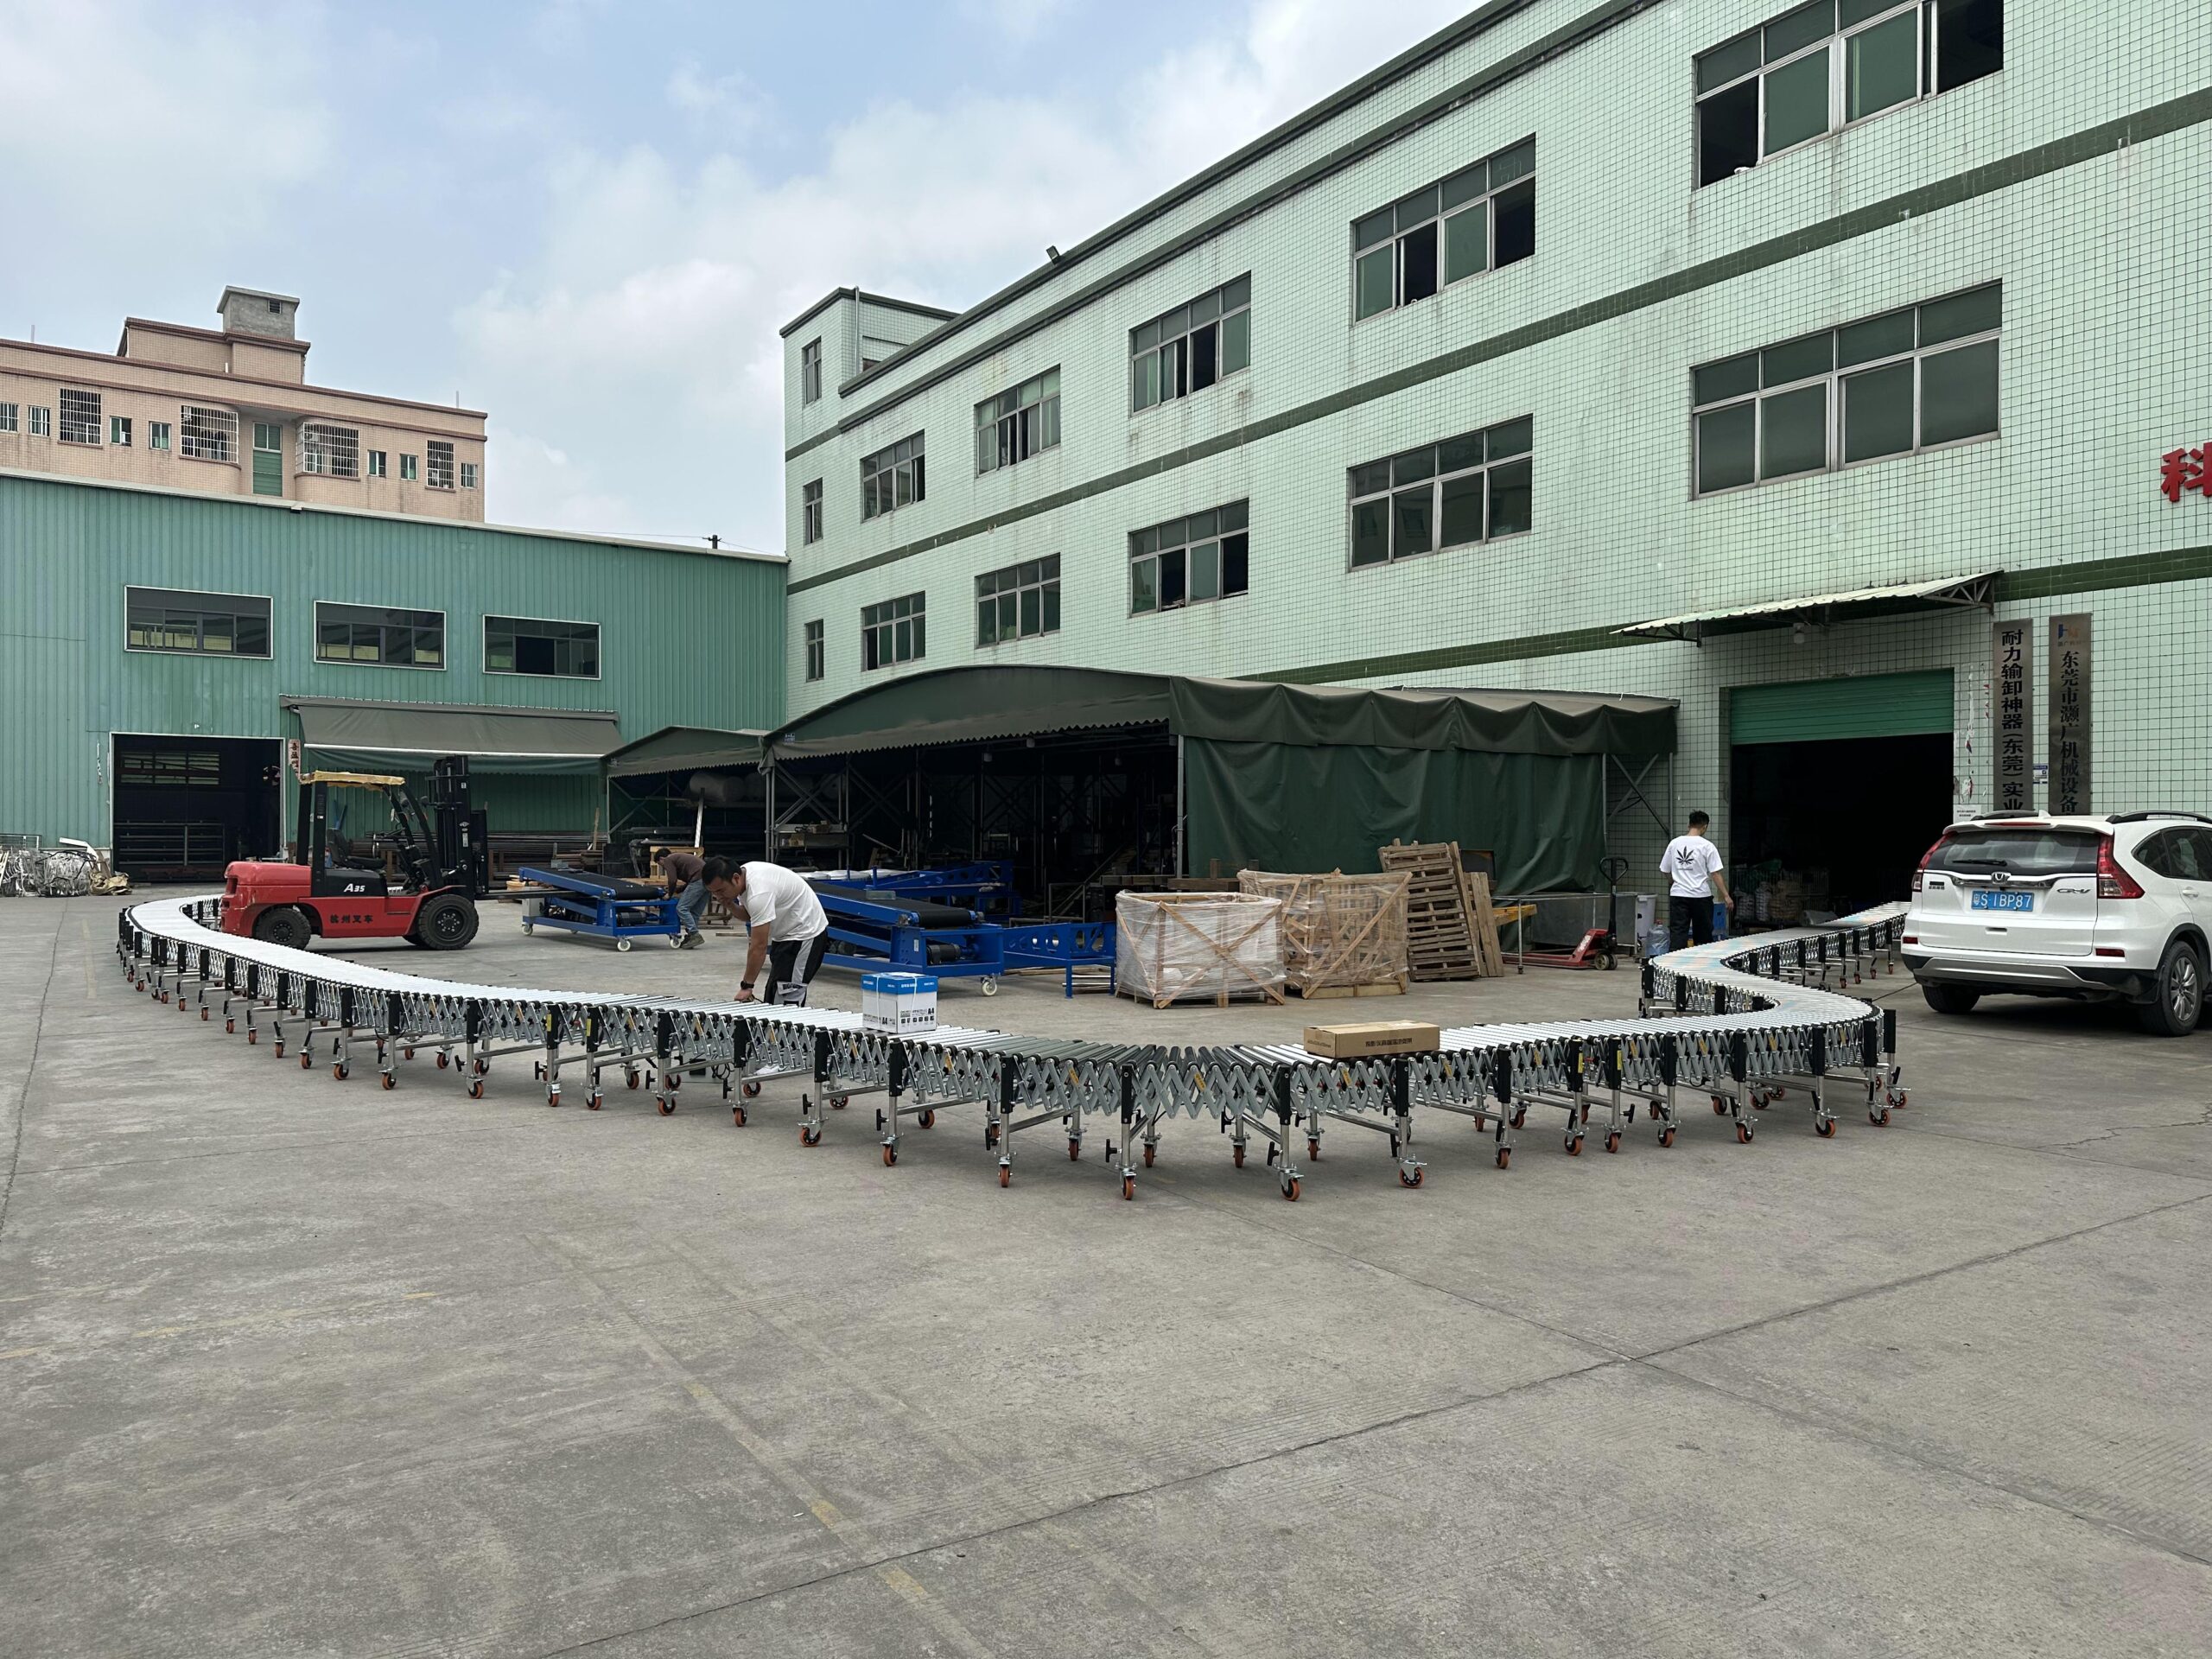
The Solution: Using Naili’s Flexible Roller/Skate Wheel Conveyors to Create Curves
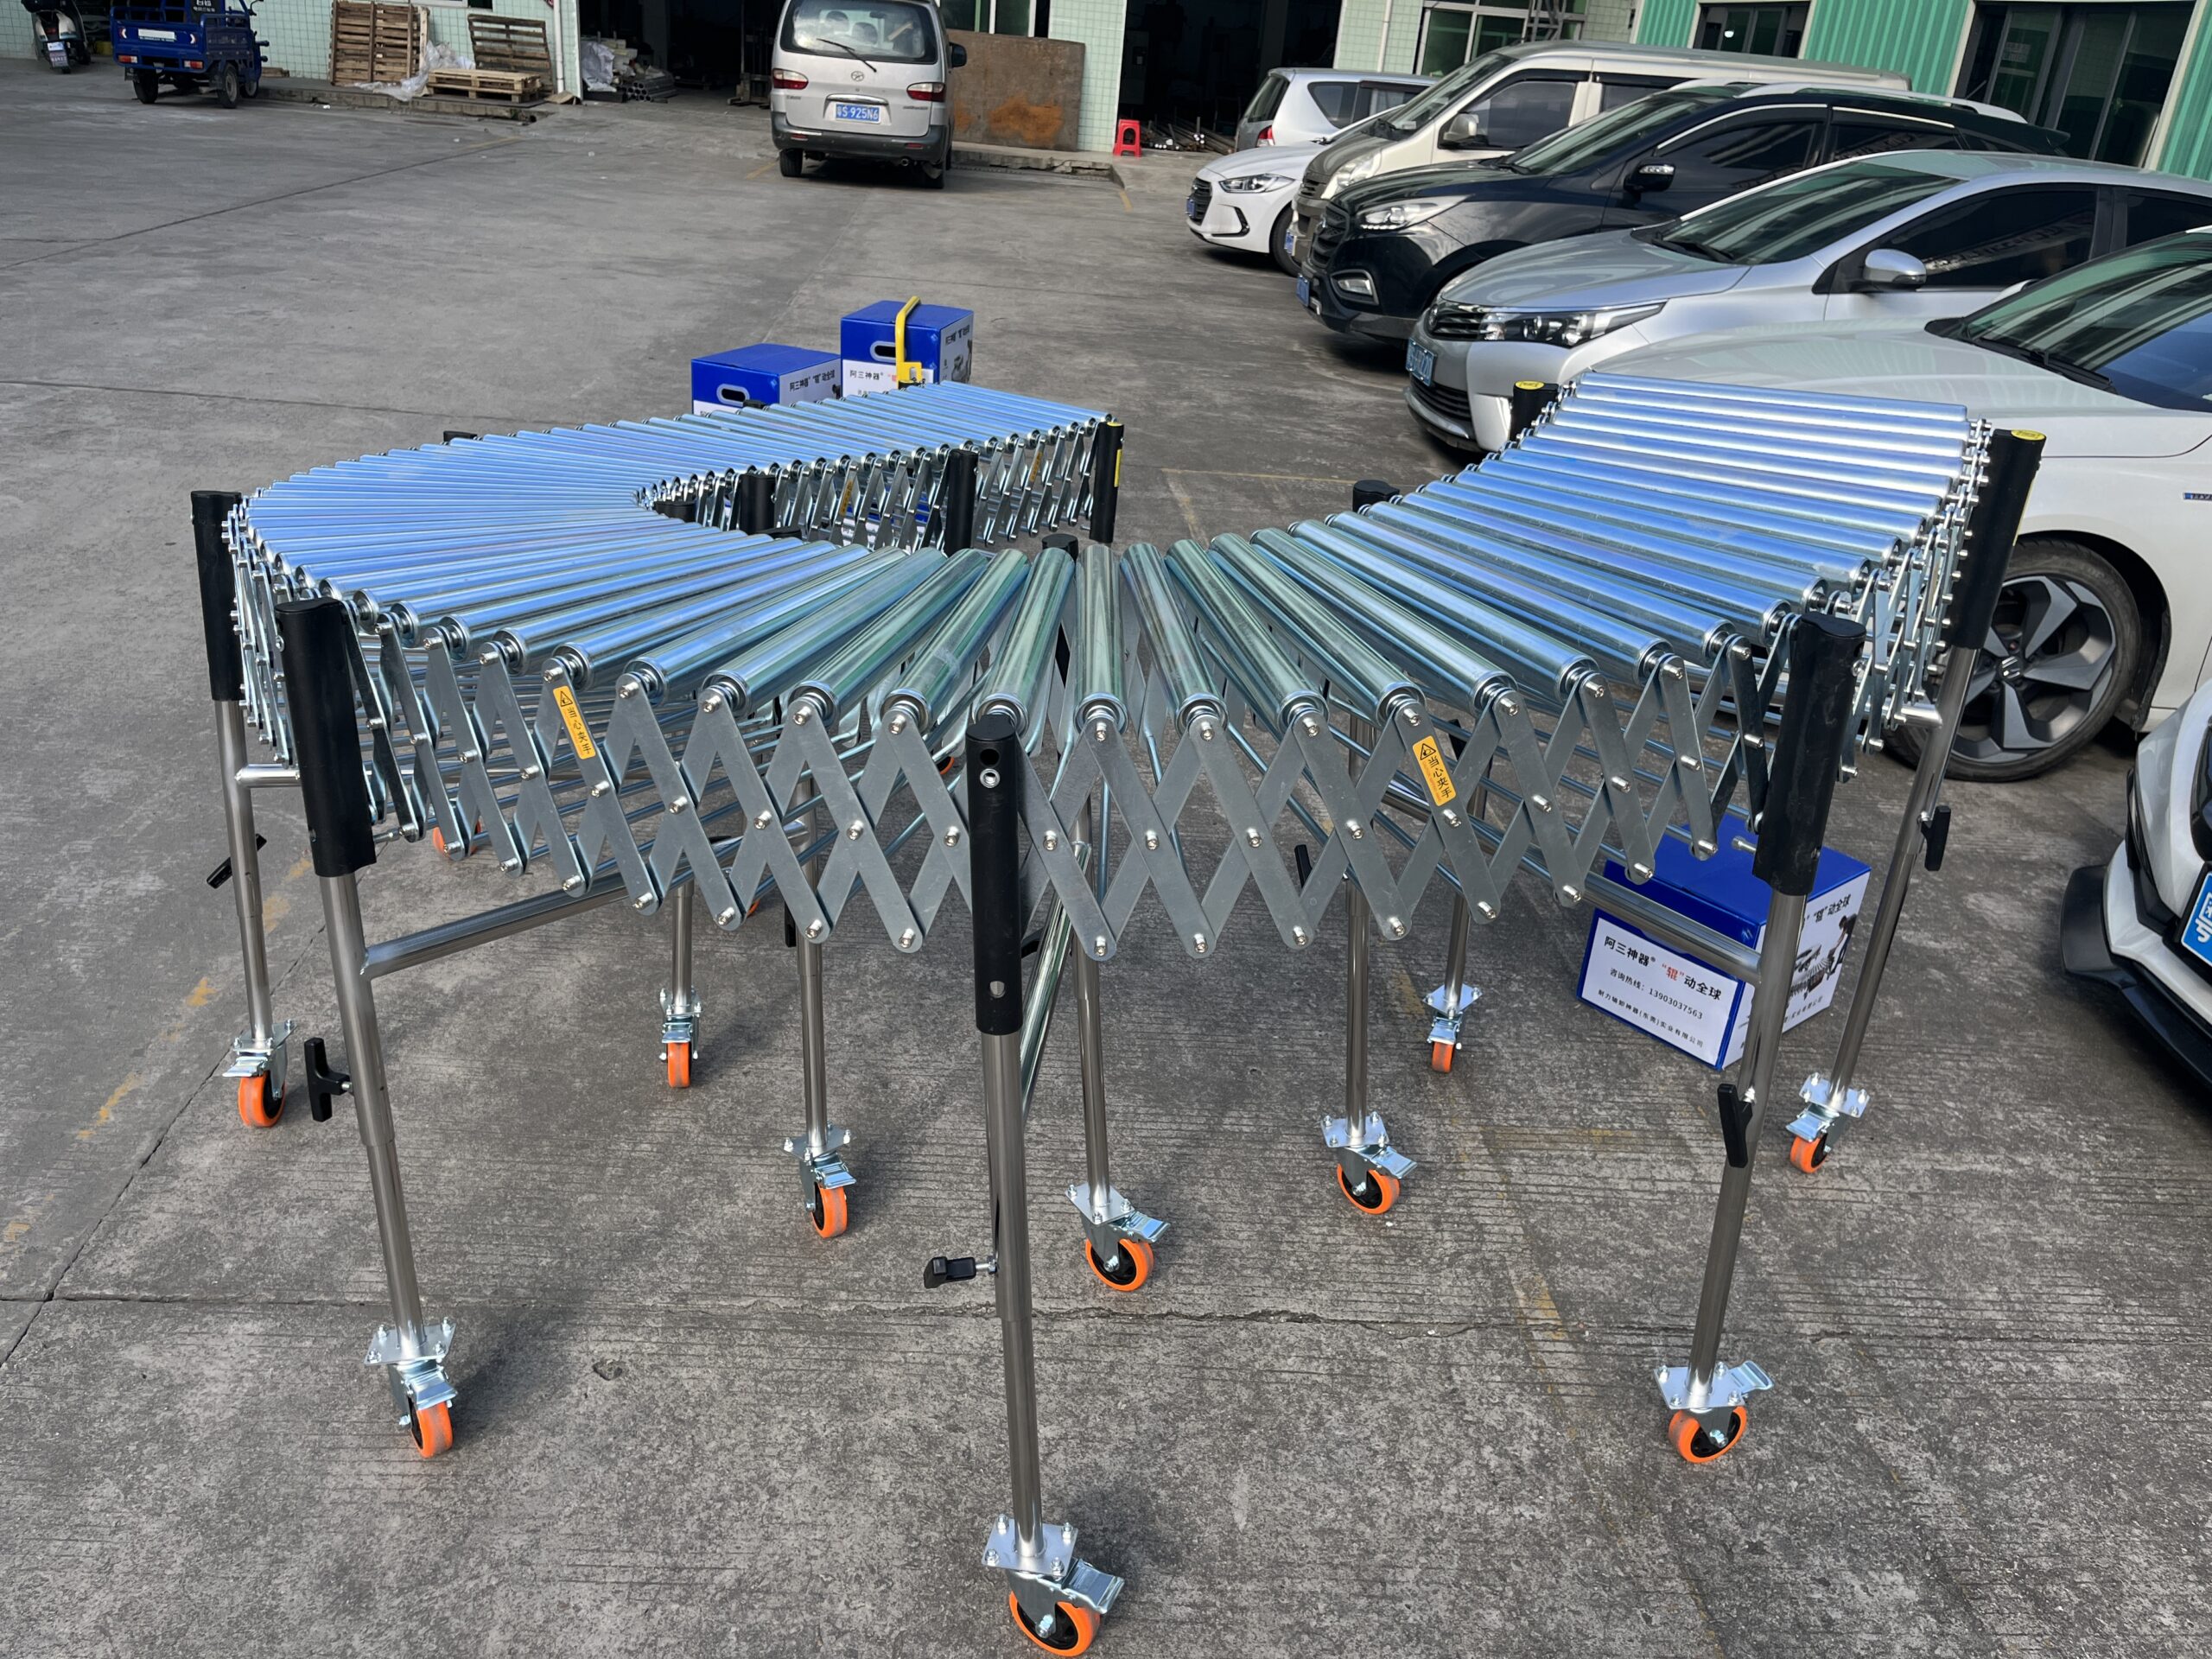
Naili’s modular roller conveyor systems offer an elegant solution to the corner challenge through their unique scissor-frame design and modular connectivity.
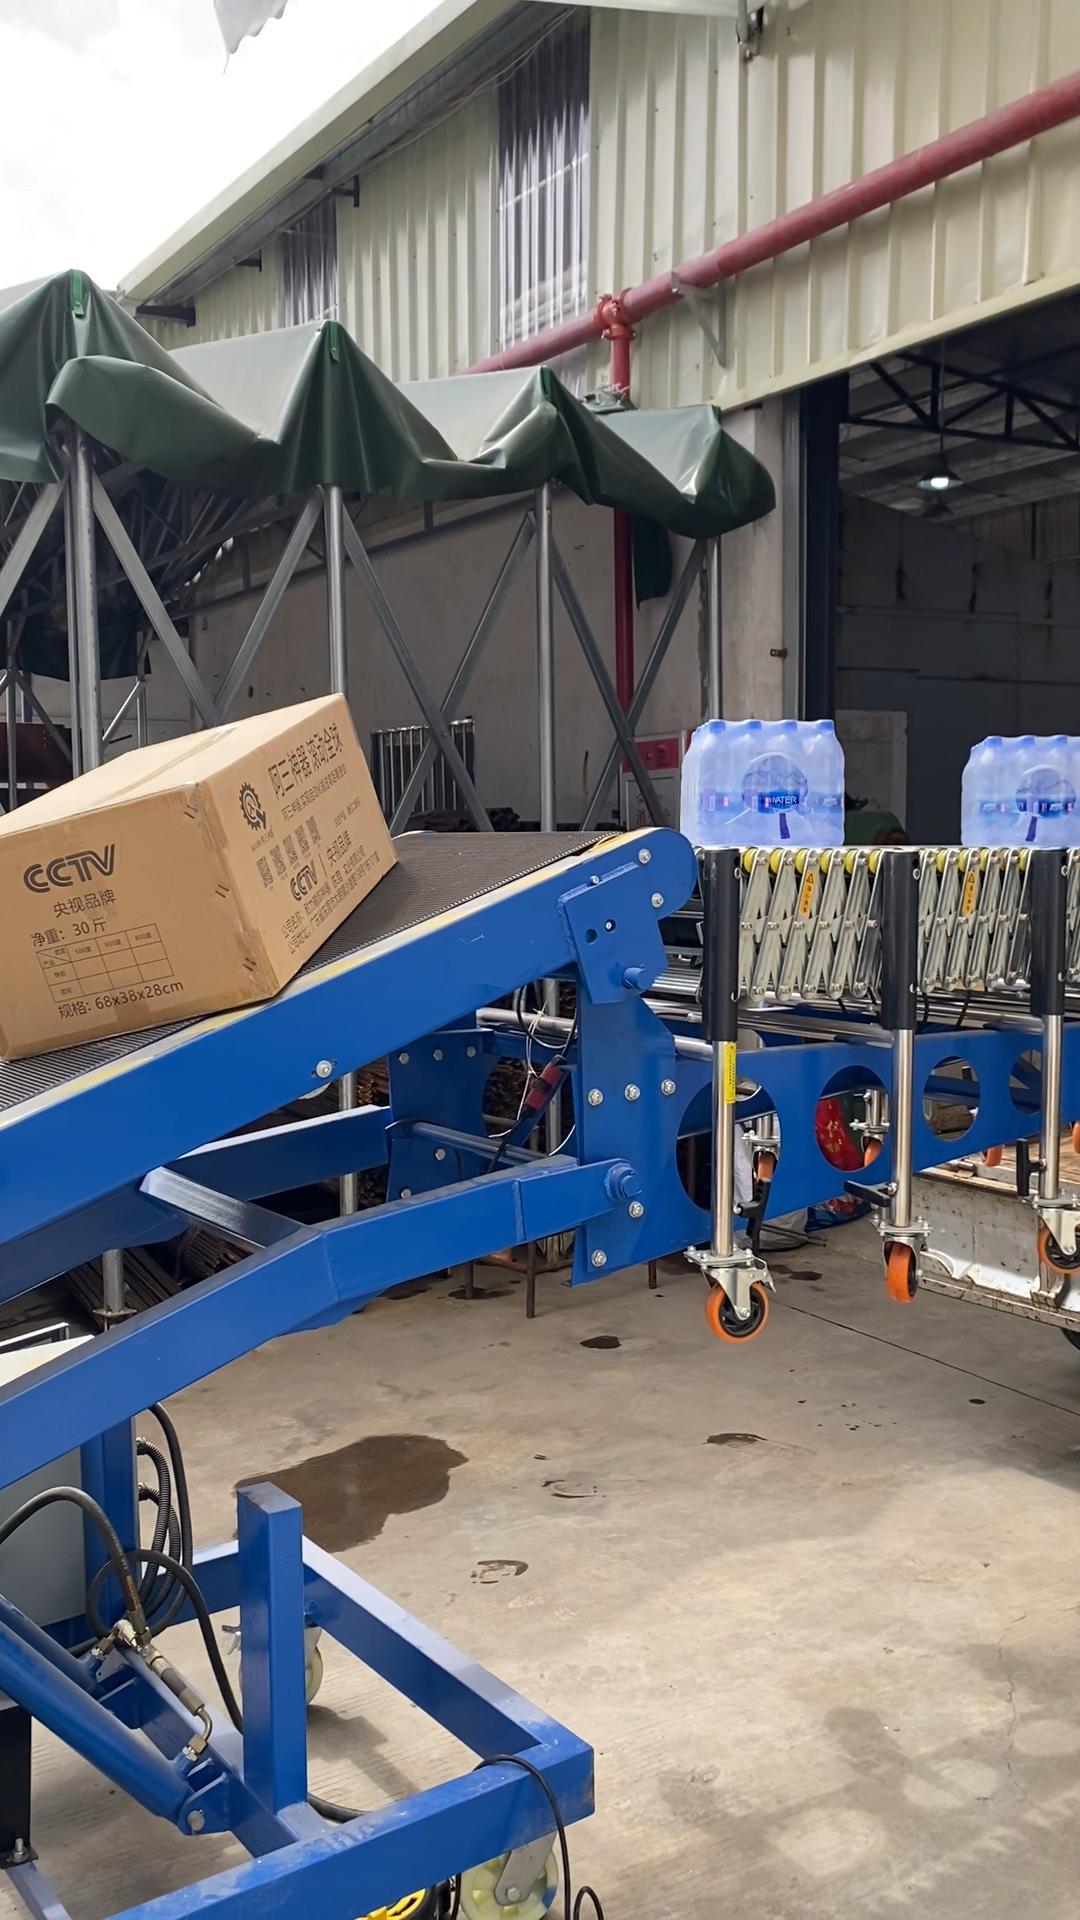
Demonstrating the natural turning capability of the flexible scissor-frame design
The key to creating effective conveyor corners lies in the expandable scissor-frame construction of both Naili’s gravity conveyor options:
Gravity Roller Conveyor Features:
- Extendable design with 1:3 expansion ratio
- Available in 50mm diameter (1500mm/section) or 38mm diameter (1700mm/section) rollers
- Strong steel frame with adjustable supports
- Scissor mechanism allows natural curve formation
- Height-adjustable legs (450-1500mm range)
- Available in 500/600/800mm widths
Gravity Skate Wheel Conveyor Advantages:
- Remarkable 1:5 extension capability (420mm collapsed to 2100mm extended)
- Lightweight design (30% lighter than roller conveyors)
- 48mm diameter skate wheels with 608 bearings
- Greater flexibility in creating tight turns
- Excellent for lighter packages with flat bottoms
- Superior space efficiency when stored
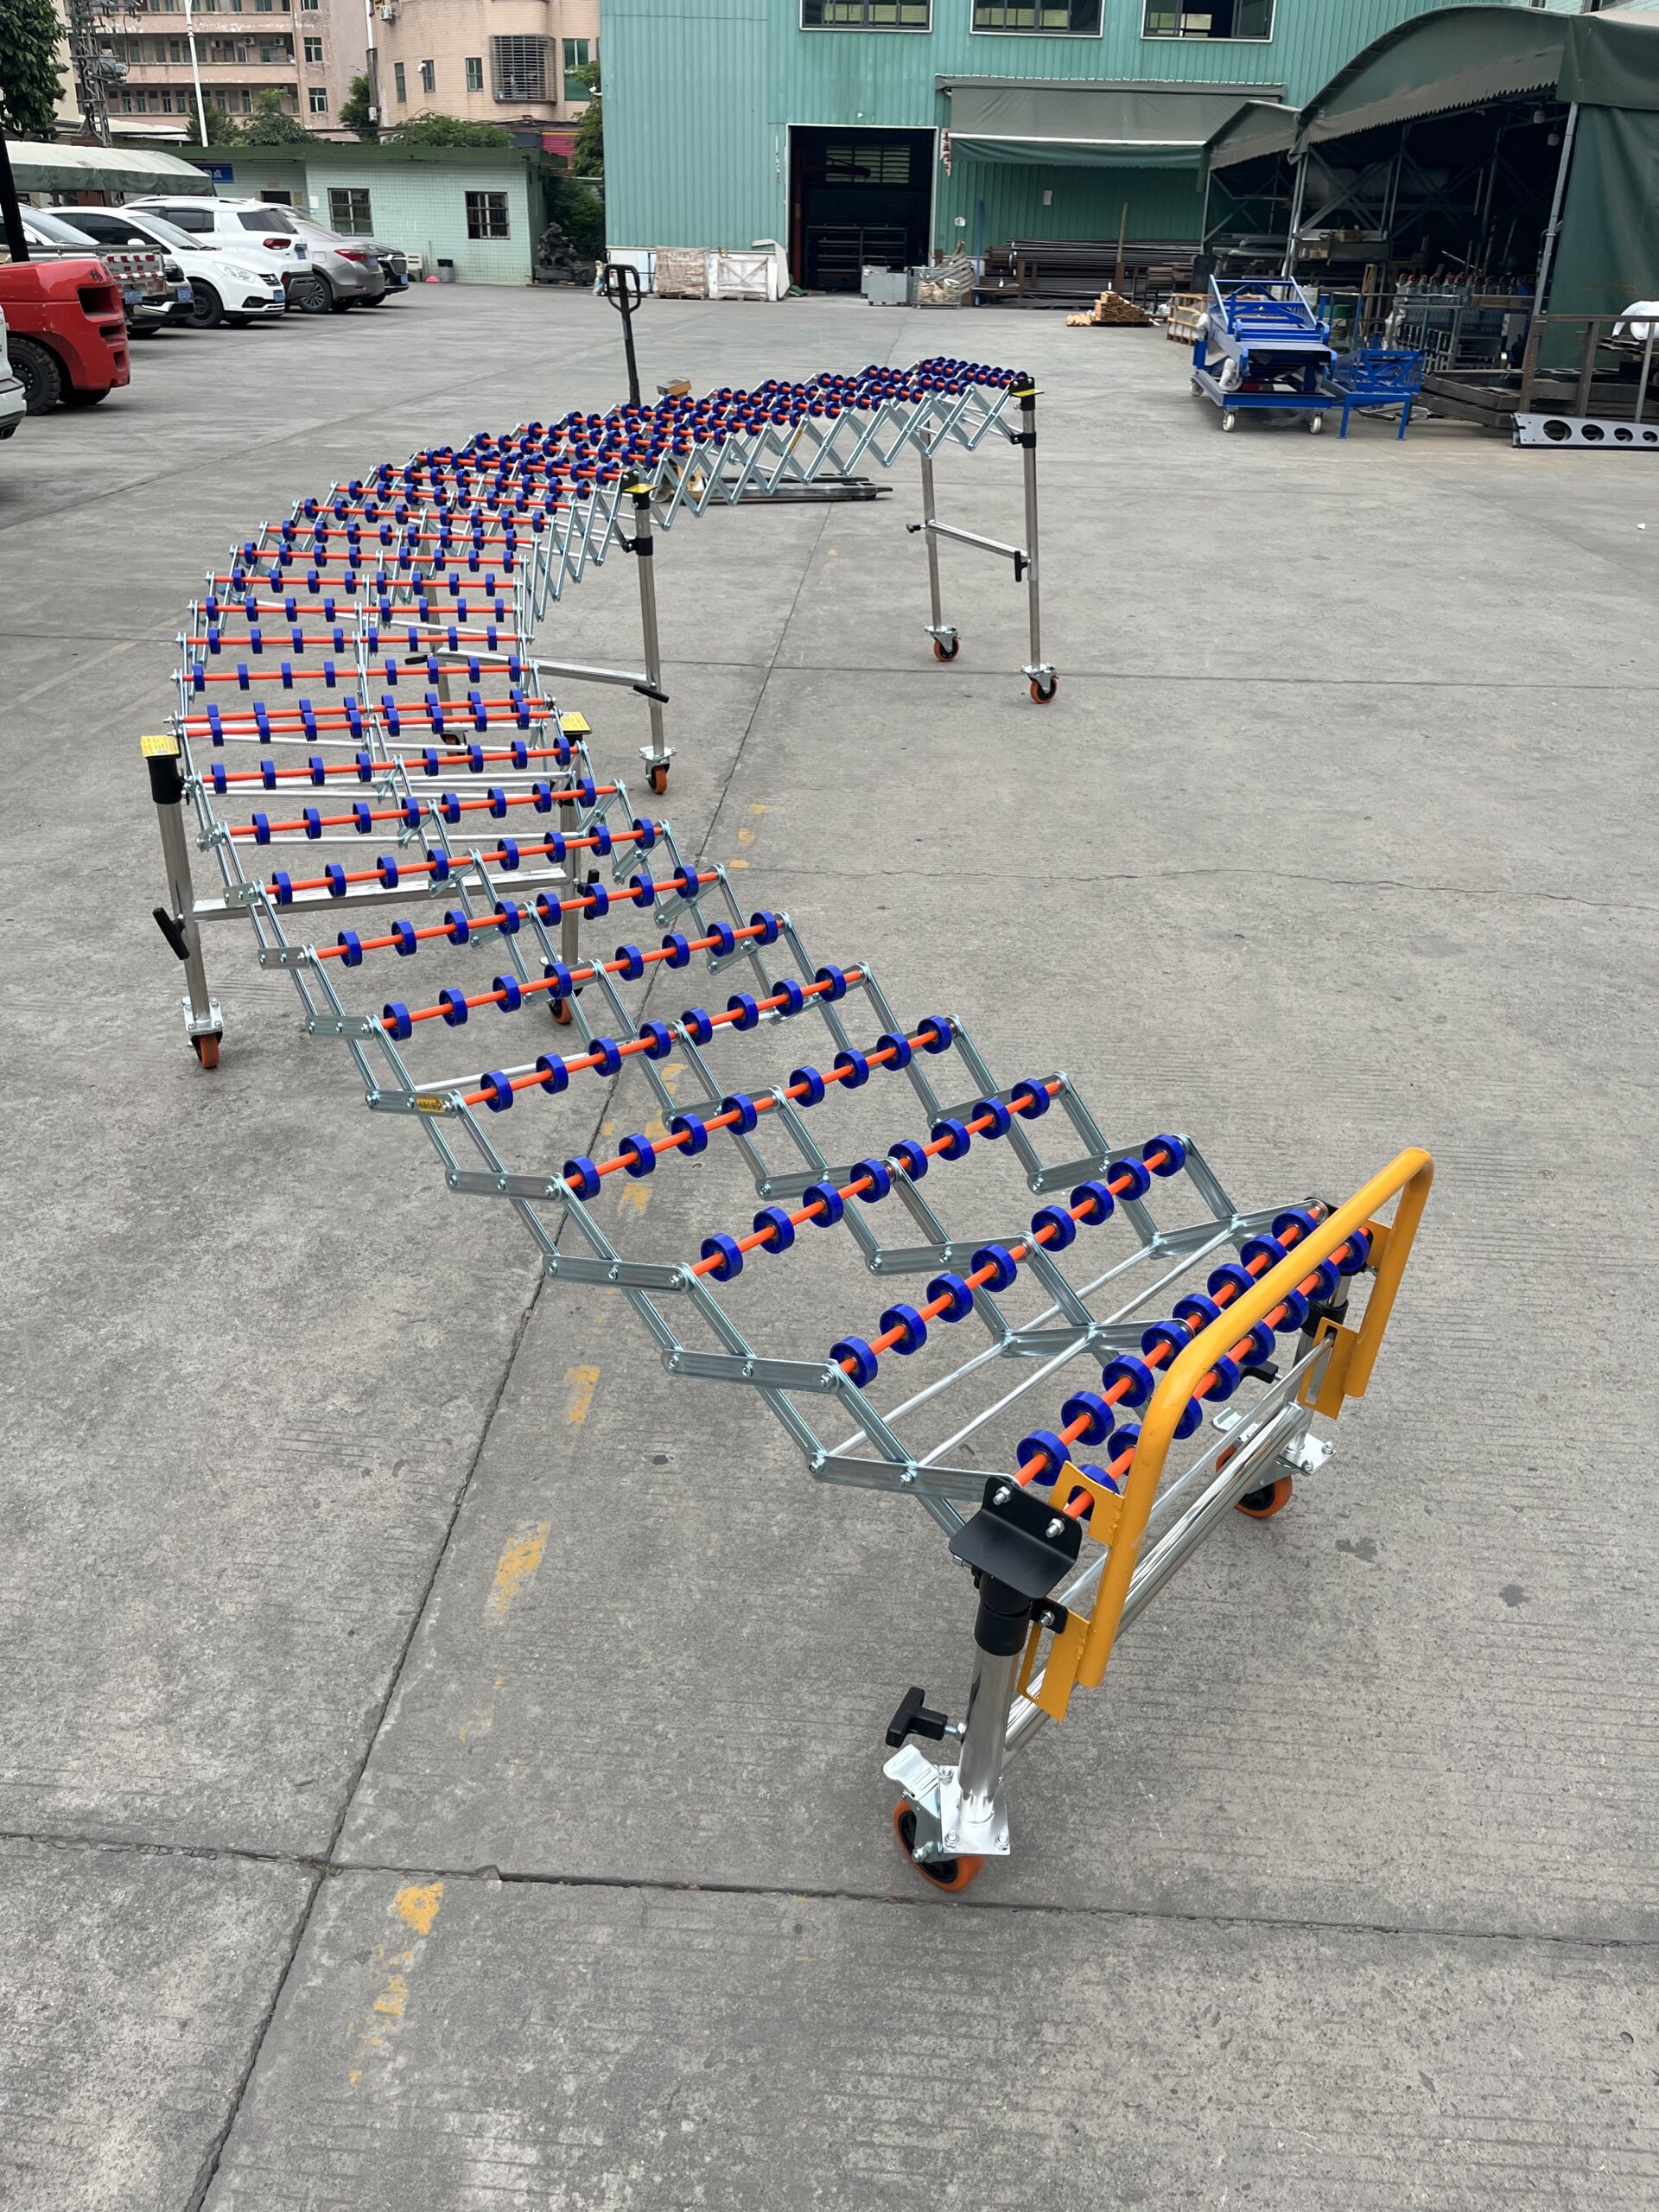
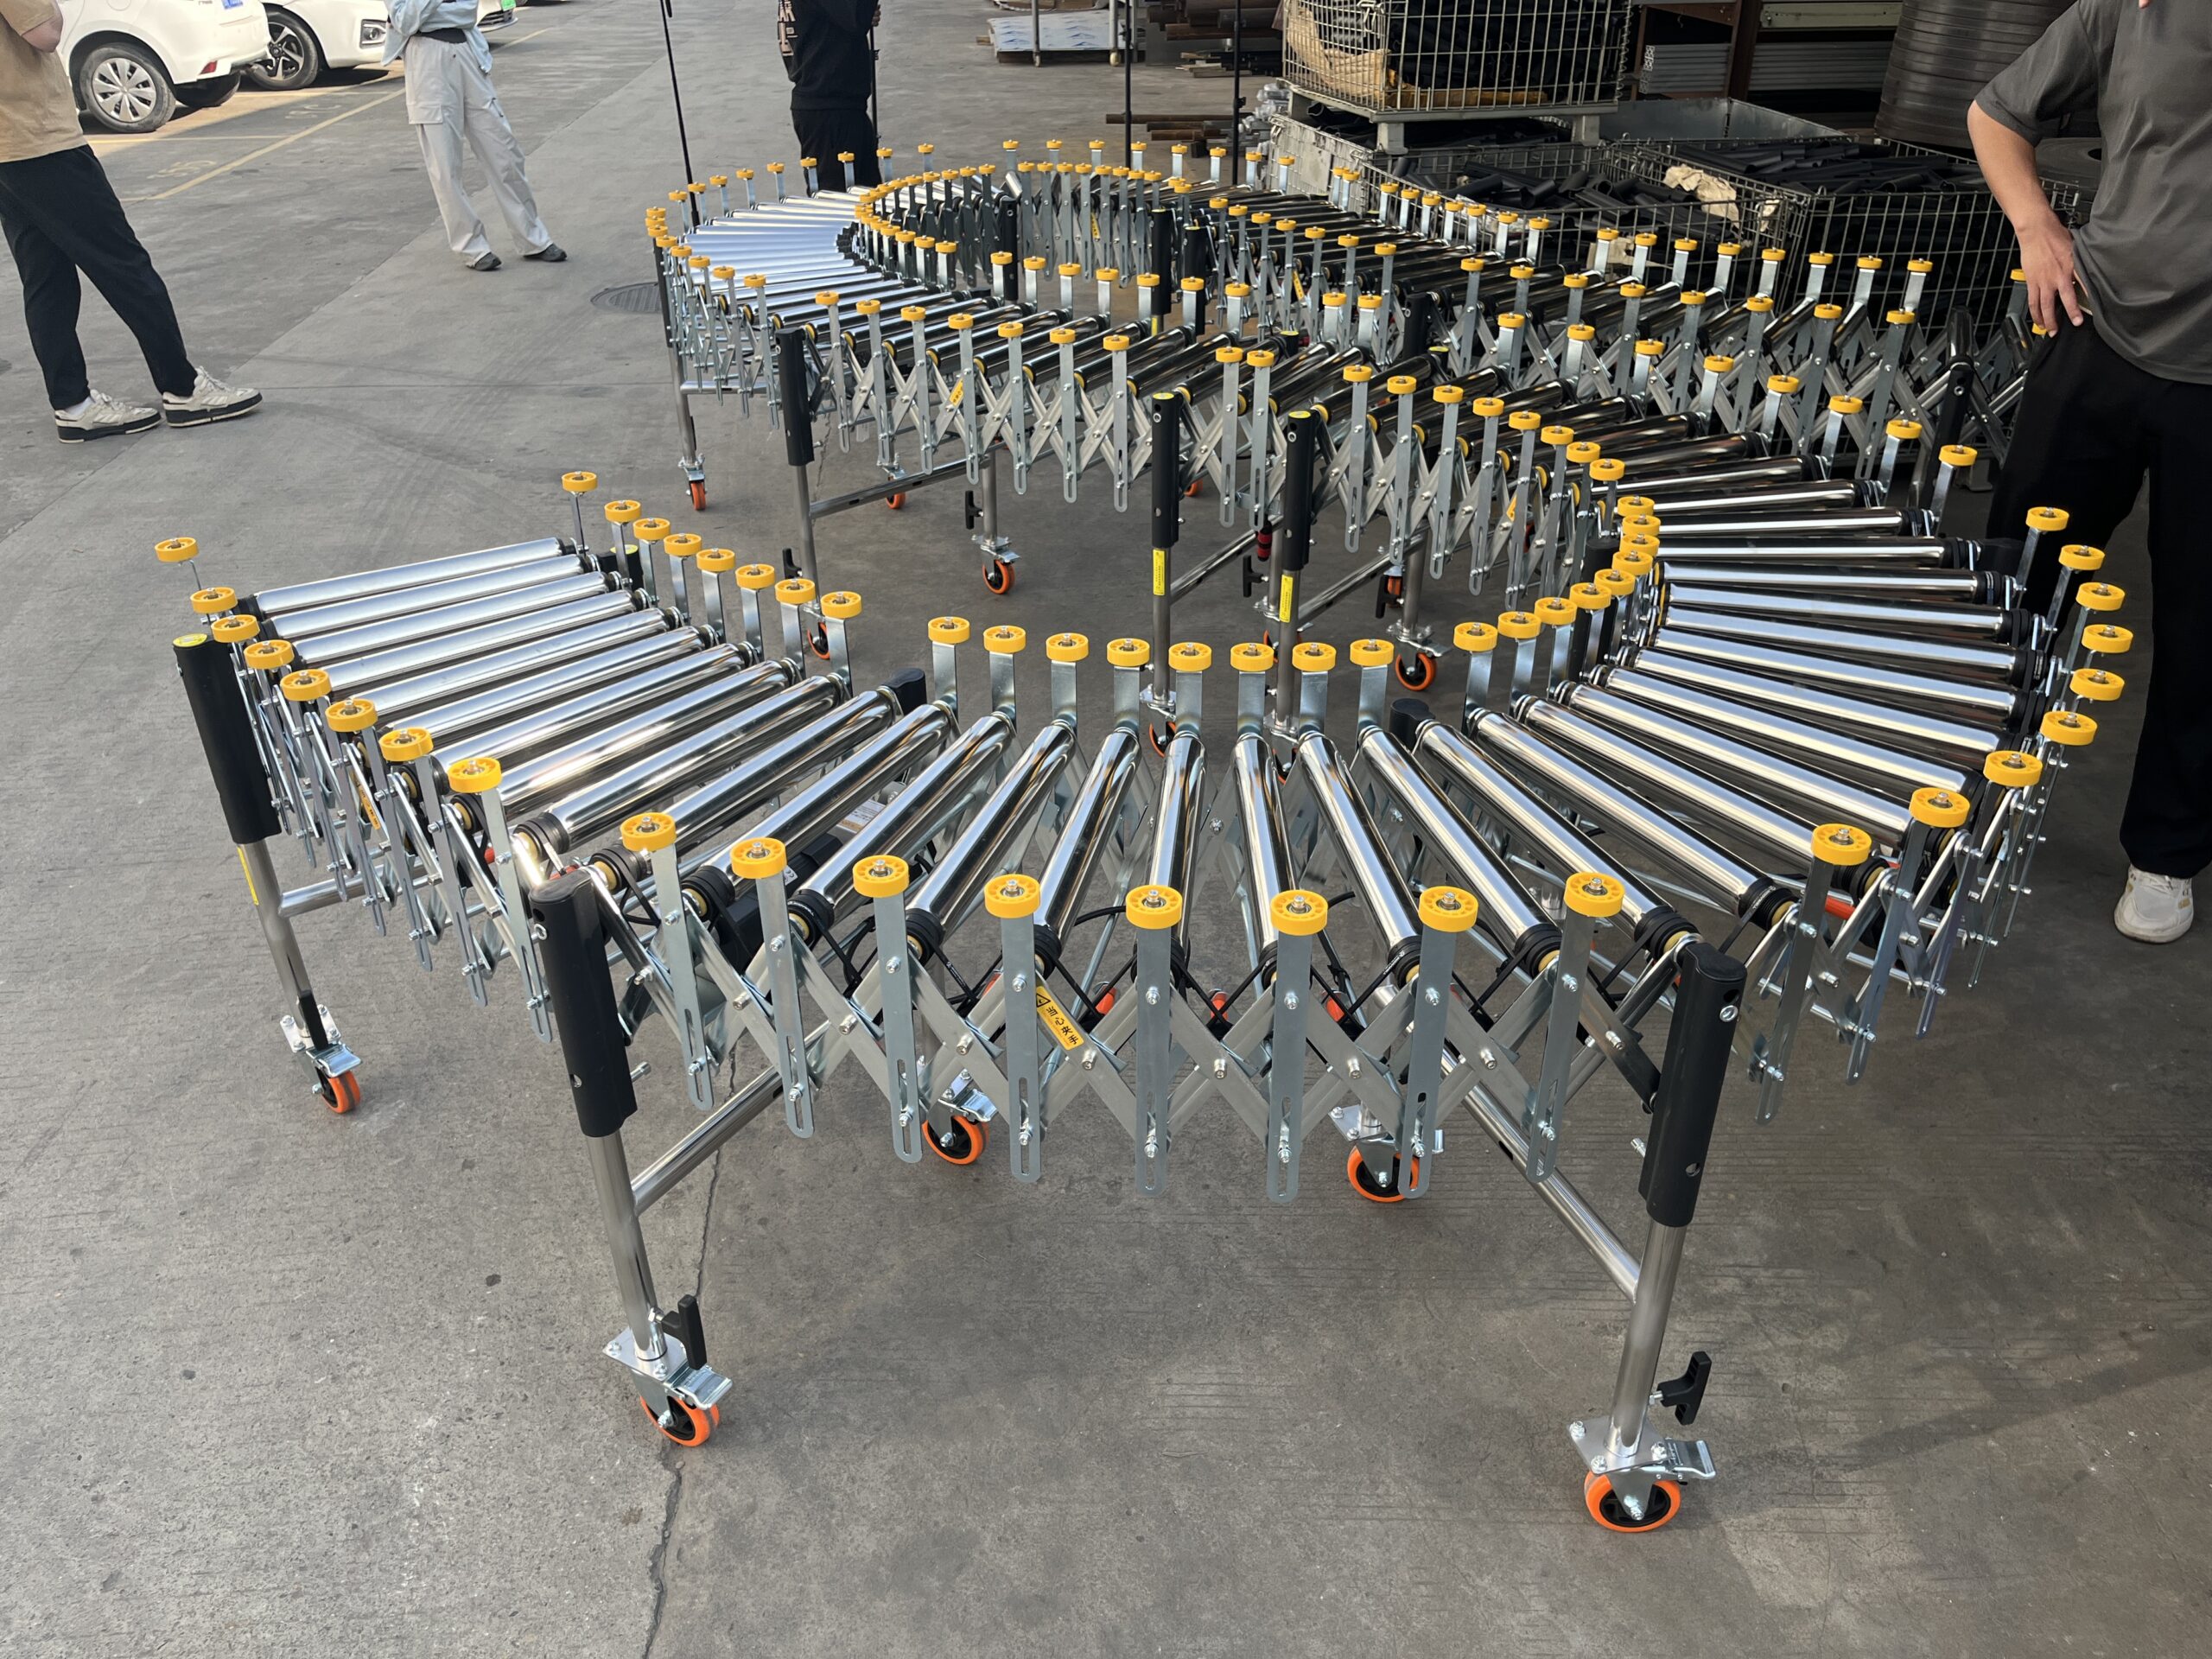
The scissor-frame design that allows these conveyors to collapse for storage also enables them to form curves when partially extended on one side. By controlling the extension differently across the width of the conveyor, the unit naturally forms an arc—creating the foundation for efficient corner turns.
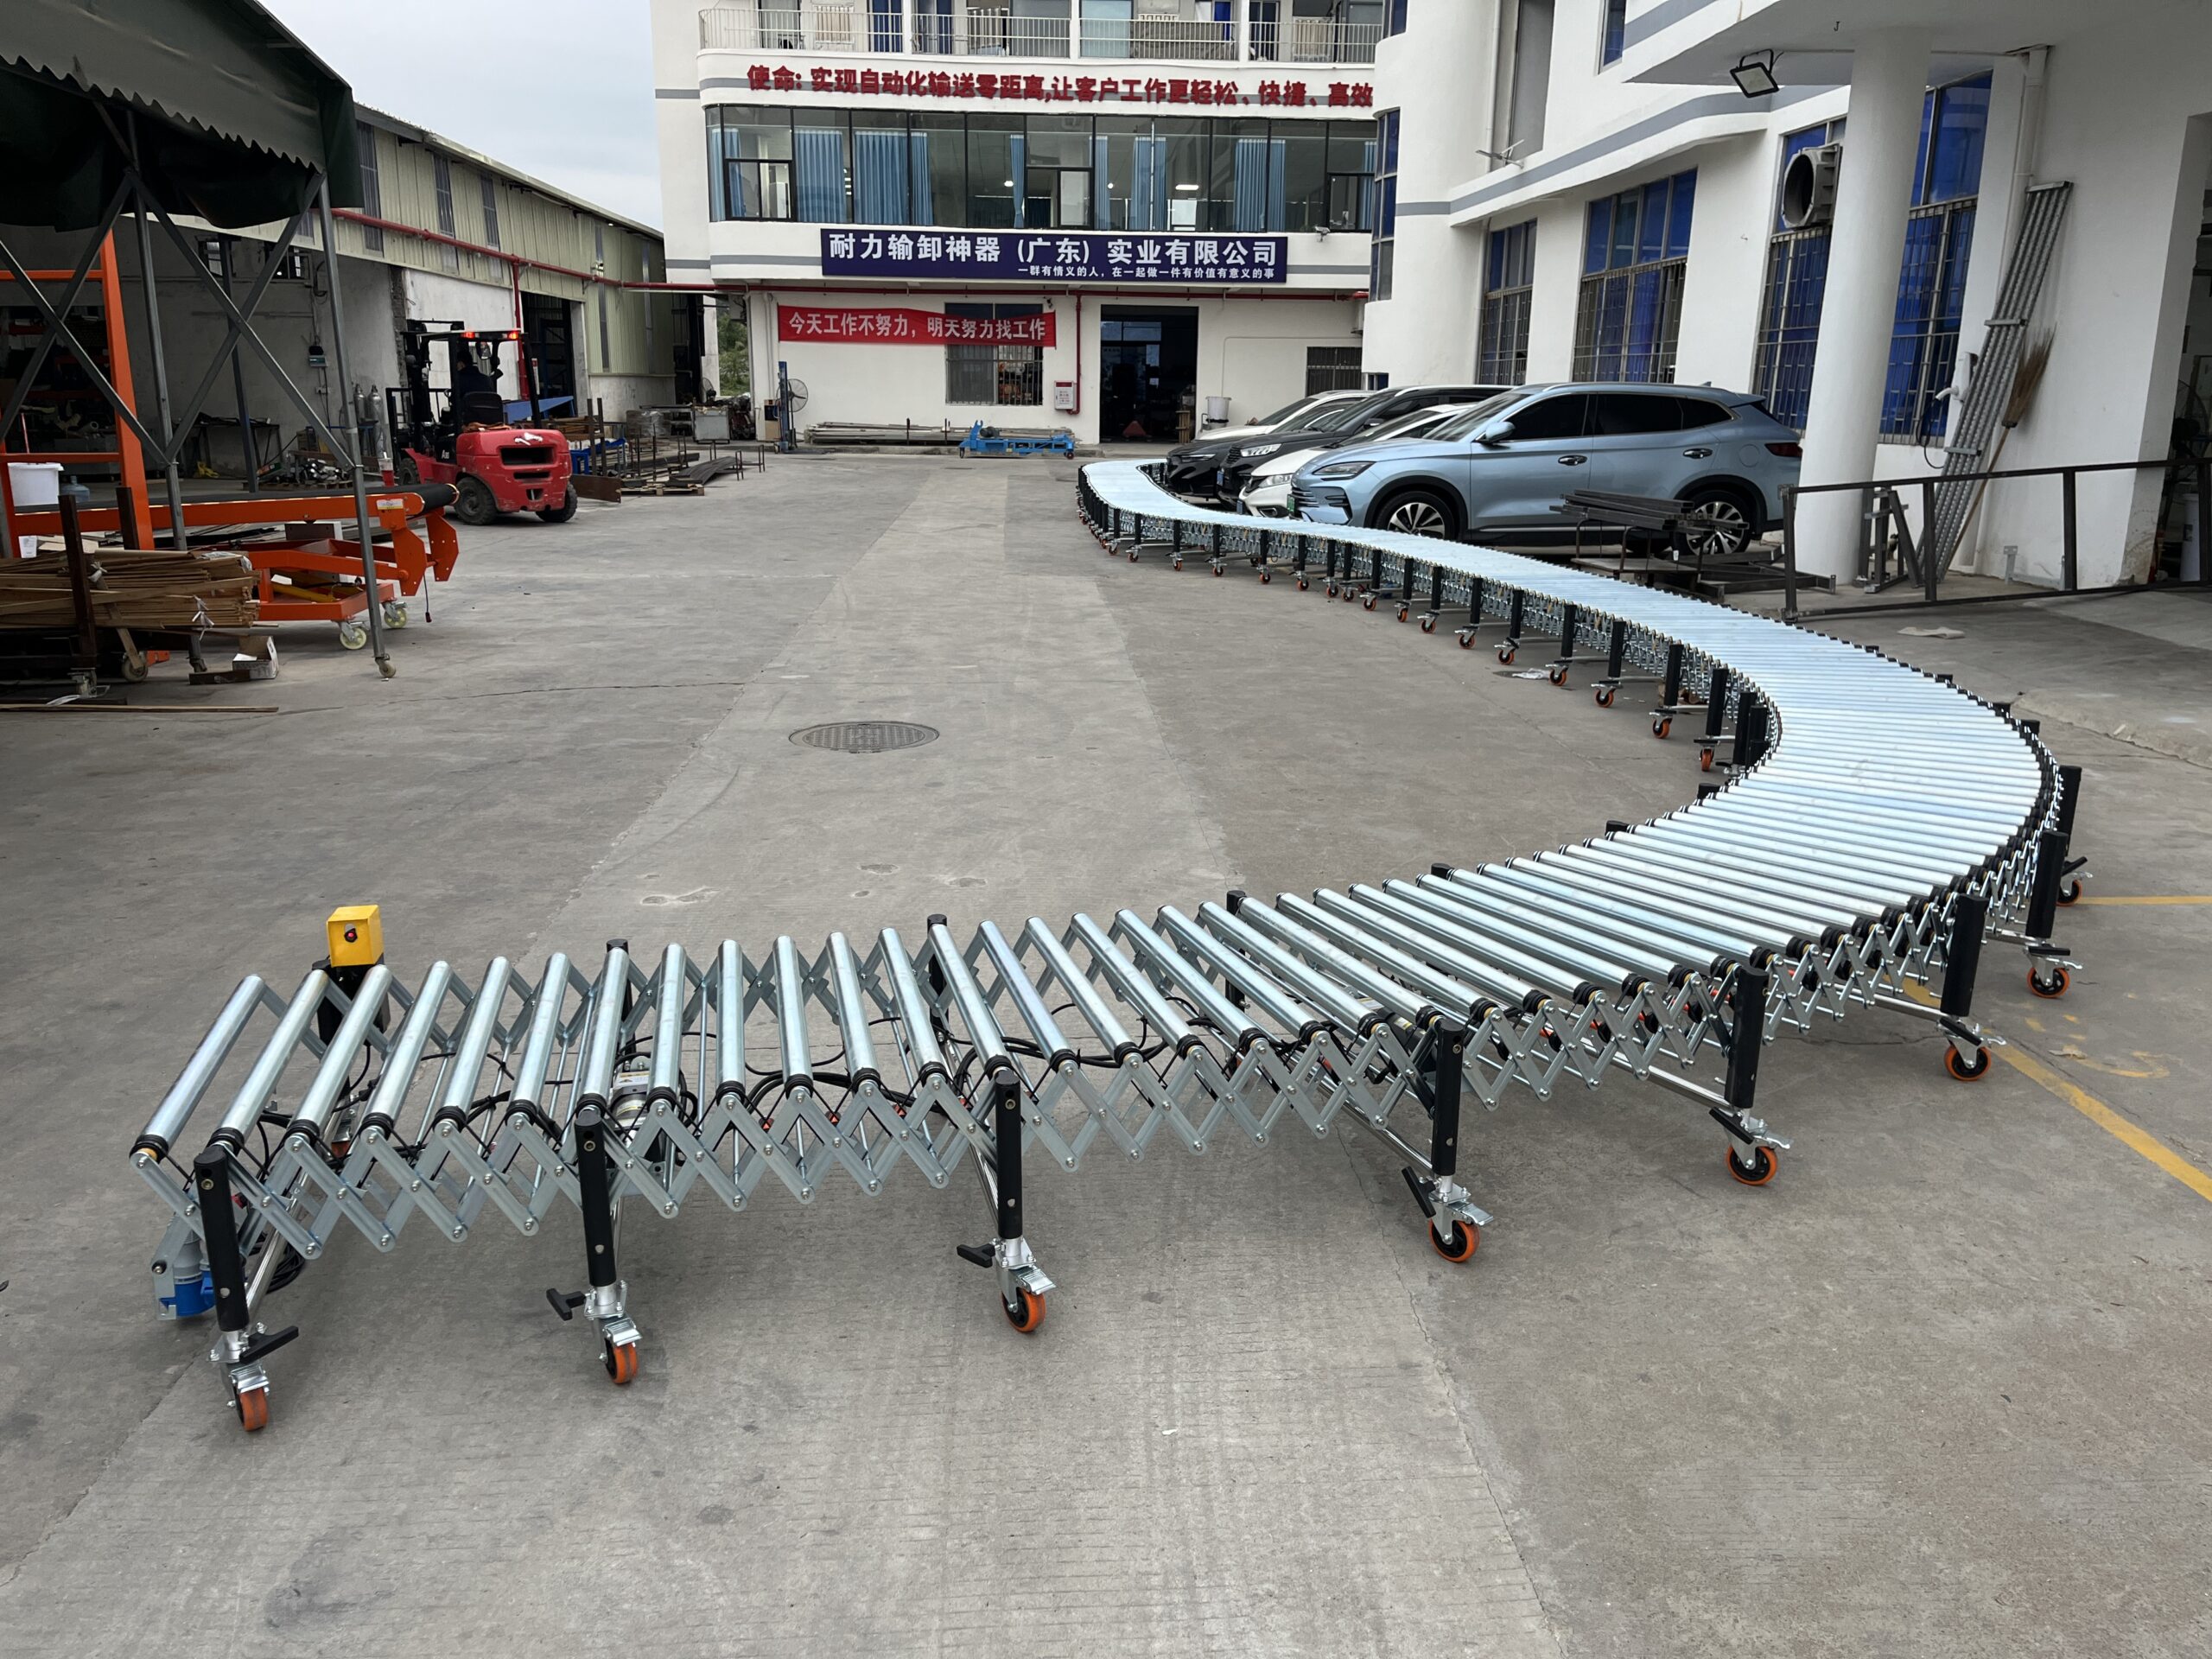
Creating bends and curves
To form a curved conveyor path:
- Extend the conveyor section fully
- Gradually compress the outer edge while maintaining the inner edge extension
- The scissor mechanism naturally creates an arc formation
- Adjust the curve radius by varying the degree of compression
- Connect multiple sections to create continuous curved paths
This simple mechanical principle allows warehouse staff to quickly configure conveyor routes that navigate around obstacles without specialized tools or engineering expertise.
Creating a 90-Degree Turn: A Practical Guide
Setting up an effective 90-degree turn in your corner conveyor solution requires thoughtful planning and proper execution. Here’s a step-by-step approach:
How many sections are needed?
The number of conveyor sections needed depends on:
- Turn radius required: Tighter turns need more sections
- Package size: Larger items require gentler curves
- Conveyor width: Wider conveyors need more sections to make the same turn
For a standard 90-degree turn using Naili’s products:
| Conveyor Type | Width | Sections Needed for 90° Turn | Approximate Footprint |
| Gravity Skate Wheel | 500mm | 2-3 sections | 2.5m × 2.5m |
| Gravity Skate Wheel | 600mm | 3 sections | 3m × 3m |
| Gravity Skate Wheel | 800mm | 3-4 sections | 3.5m × 3.5m |
| Roller (38mm) | 500mm | 3 sections | 3m × 3m |
| Roller (38mm) | 600mm | 3-4 sections | 3.5m × 3.5m |
| Roller (38mm) | 800mm | 4 sections | 4m × 4m |
| Roller (50mm) | 500mm | 3-4 sections | 3.5m × 3.5m |
| Roller (50mm) | 600mm | 4 sections | 4m × 4m |
| Roller (50mm) | 800mm | 4-5 sections | 4.5m × 4.5m |
The skate wheel conveyor’s greater flexibility allows for tighter turns with fewer sections, making it ideal for space-constrained environments.
Practical example: For a 90-degree turn using 600mm wide Gravity Skate Wheel conveyors:
- Position three 2100mm sections end-to-end
- Form each section into a slight curve (approximately 30 degrees each)
- Connect the sections to create a smooth 90-degree turn
Adjusting leg heights to maintain flow
Proper height adjustment is critical for maintaining consistent product flow through turns:
- Identify the optimal gradient:
- For roller conveyors: 2-5 degree decline (3.5-8.7% grade)
- For skate wheel conveyors: 3-6 degree decline (5-10.5% grade)
- Create a consistent decline across the curve:
- Start with the highest point at the beginning of the turn
- Gradually lower each leg support through the turn
- Ensure the lowest point is at the end of the turn
- Use a level to verify consistent decline through the corner
- Compensate for turn resistance:
- Increase the decline slightly in the turn sections
- A typical corner may need 0.5-1 degree additional decline to maintain momentum
- Test with actual products and adjust as needed
- Fine-tune for package size and weight:
- Heavier packages require less incline
- Lighter packages may need steeper inclines
- Mixed package sizes may need compromise settings
Naili’s adjustable legs make this process straightforward, with multiple height ranges available (450-680mm, 550-820mm, 750-1200mm, or 900-1500mm) to accommodate various facility requirements.
Connecting powered and gravity sections seamlessly
For operations requiring both gravity and powered sections, proper transition planning is essential:
- Matching heights at transition points:
- Ensure roller or wheel heights align precisely
- Use adjustable legs to create perfect transitions
- Maintain a 2-3mm maximum gap between sections
- Speed synchronization:
- Calculate gravity section speed based on incline
- Set powered section speed slightly faster than gravity section
- For entry from powered to gravity, set powered section 10-15% slower
- Connection methods:
- Use connector brackets between sections
- Secure legs to prevent movement during operation
- Lock casters once positioned correctly
- Flow control options:
- Add small stops at critical transition points if needed
- Consider speed controllers at the end of gravity sections
- Use guide rails through transitions for package alignment
Remember that powered conveyor sections should typically be positioned before and after gravity corner sections in high-volume operations to maintain consistent flow and prevent package collisions.

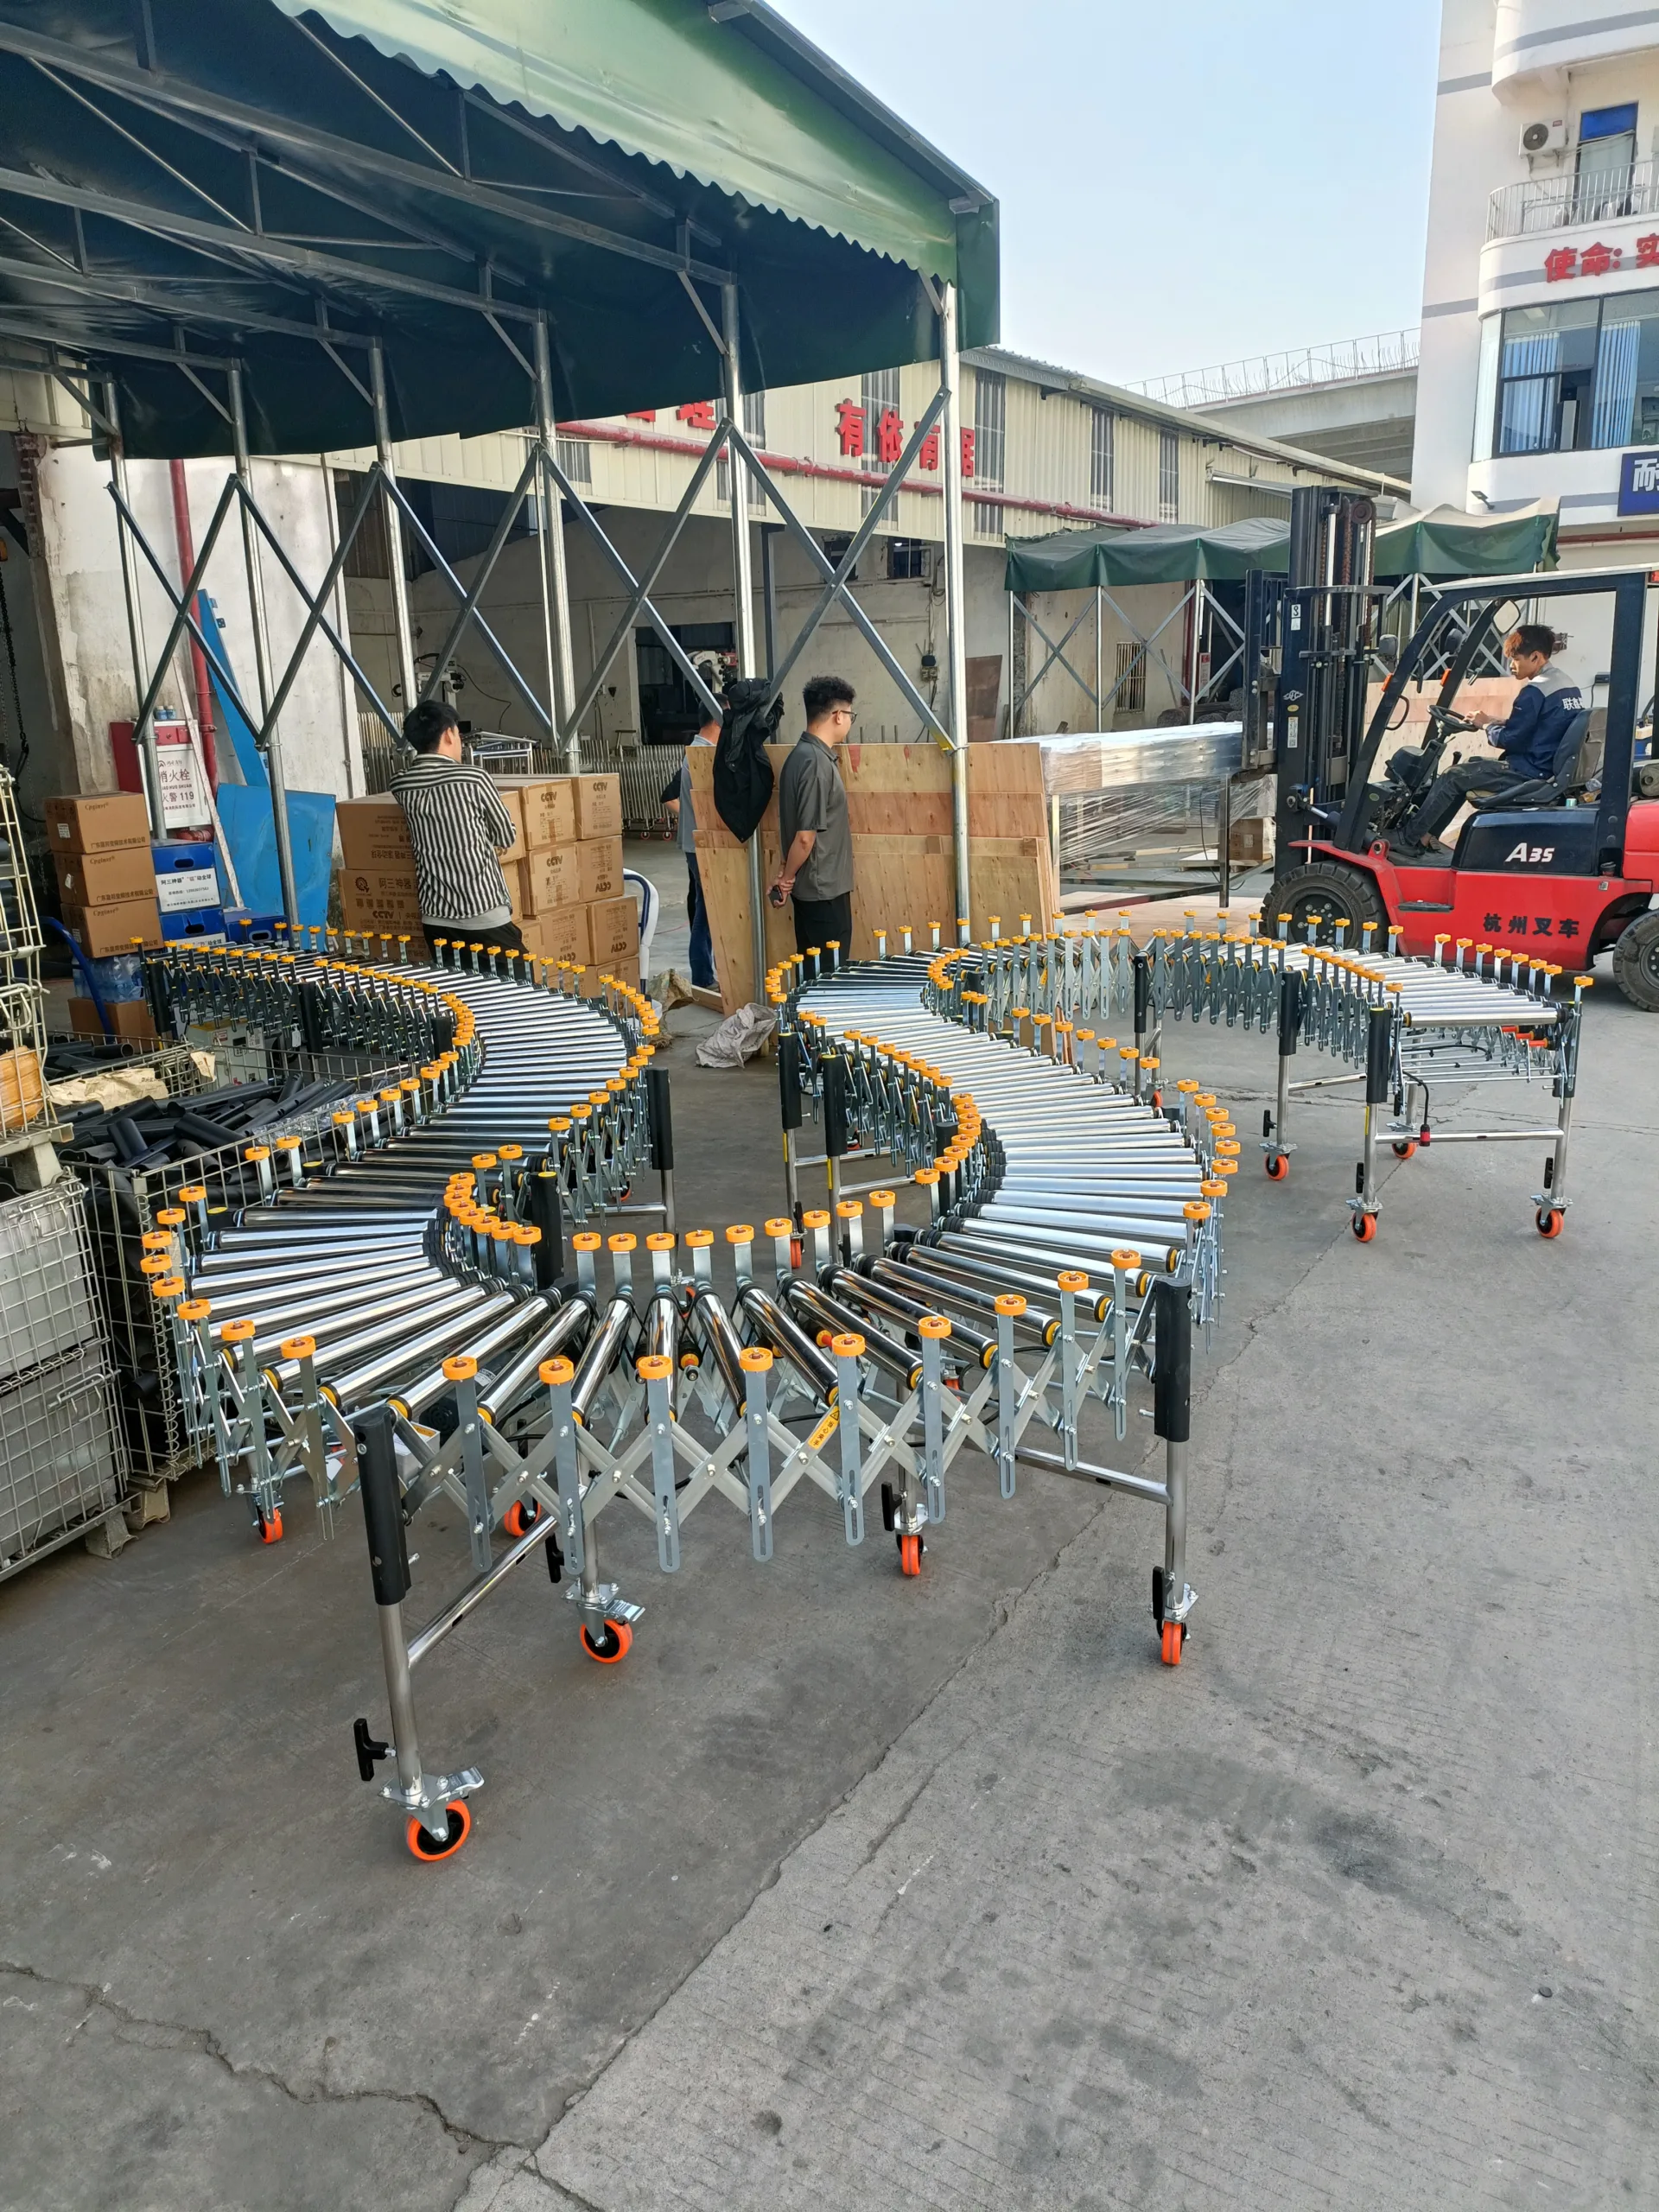
Advanced Layouts: S-Curves and U-Turns
Once you’ve mastered basic 90-degree turns, more complex configurations become possible to navigate challenging floor layouts and optimize workflow.
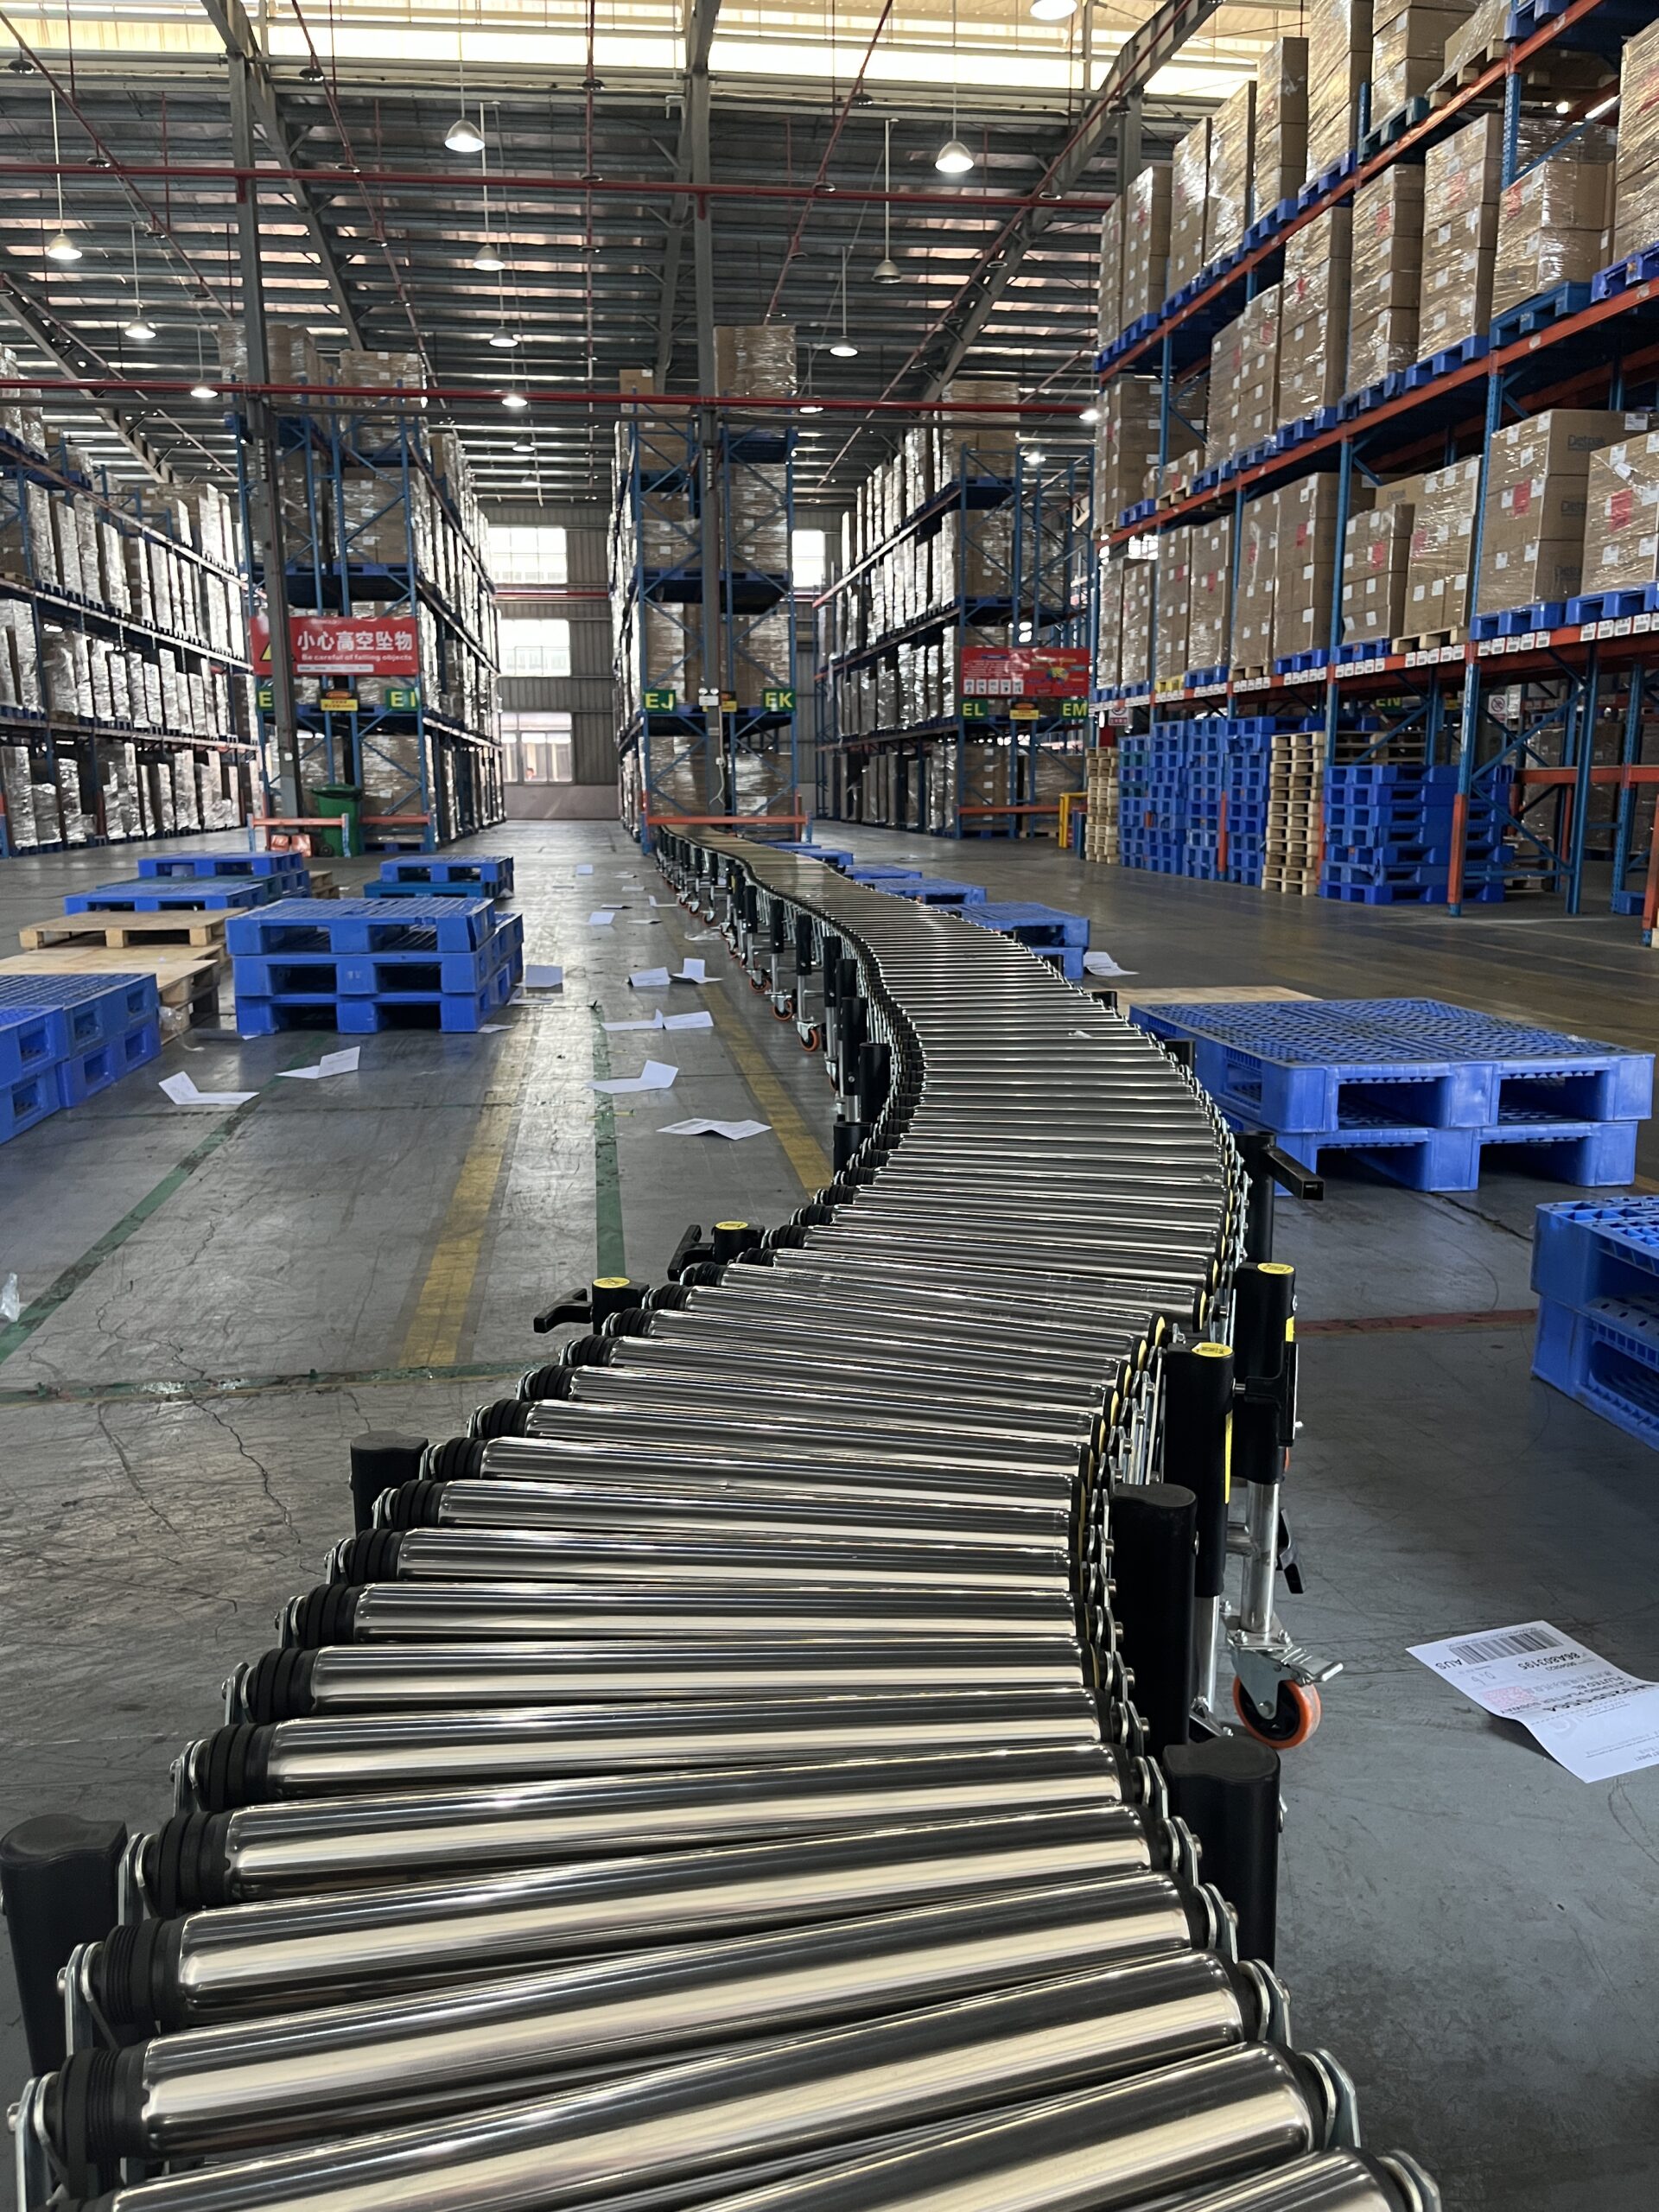
Designing a conveyor path to bypass obstacles or connect adjacent work zones
S-Curve Configurations
S-curves allow conveyor lines to shift laterally while maintaining the same directional flow, perfect for navigating around columns or other obstacles:
- Planning the S-curve:
- Identify the entry and exit points
- Measure the lateral offset needed
- Determine available space for the curve
- Calculate the number of sections required (typically 4-6)
- Implementation technique:
- Create two opposing curves connected in sequence
- Form the first curve using 2-3 sections
- Create a short straight section if needed
- Form the second curve in the opposite direction
- Adjust leg heights to maintain consistent decline through both curves
- Optimizing flow through S-curves:
- Use slightly steeper inclines to overcome increased friction
- Install guide rails on both sides through the curves
- Ensure transitions between curve sections are smooth
- Test with various package sizes to verify performance

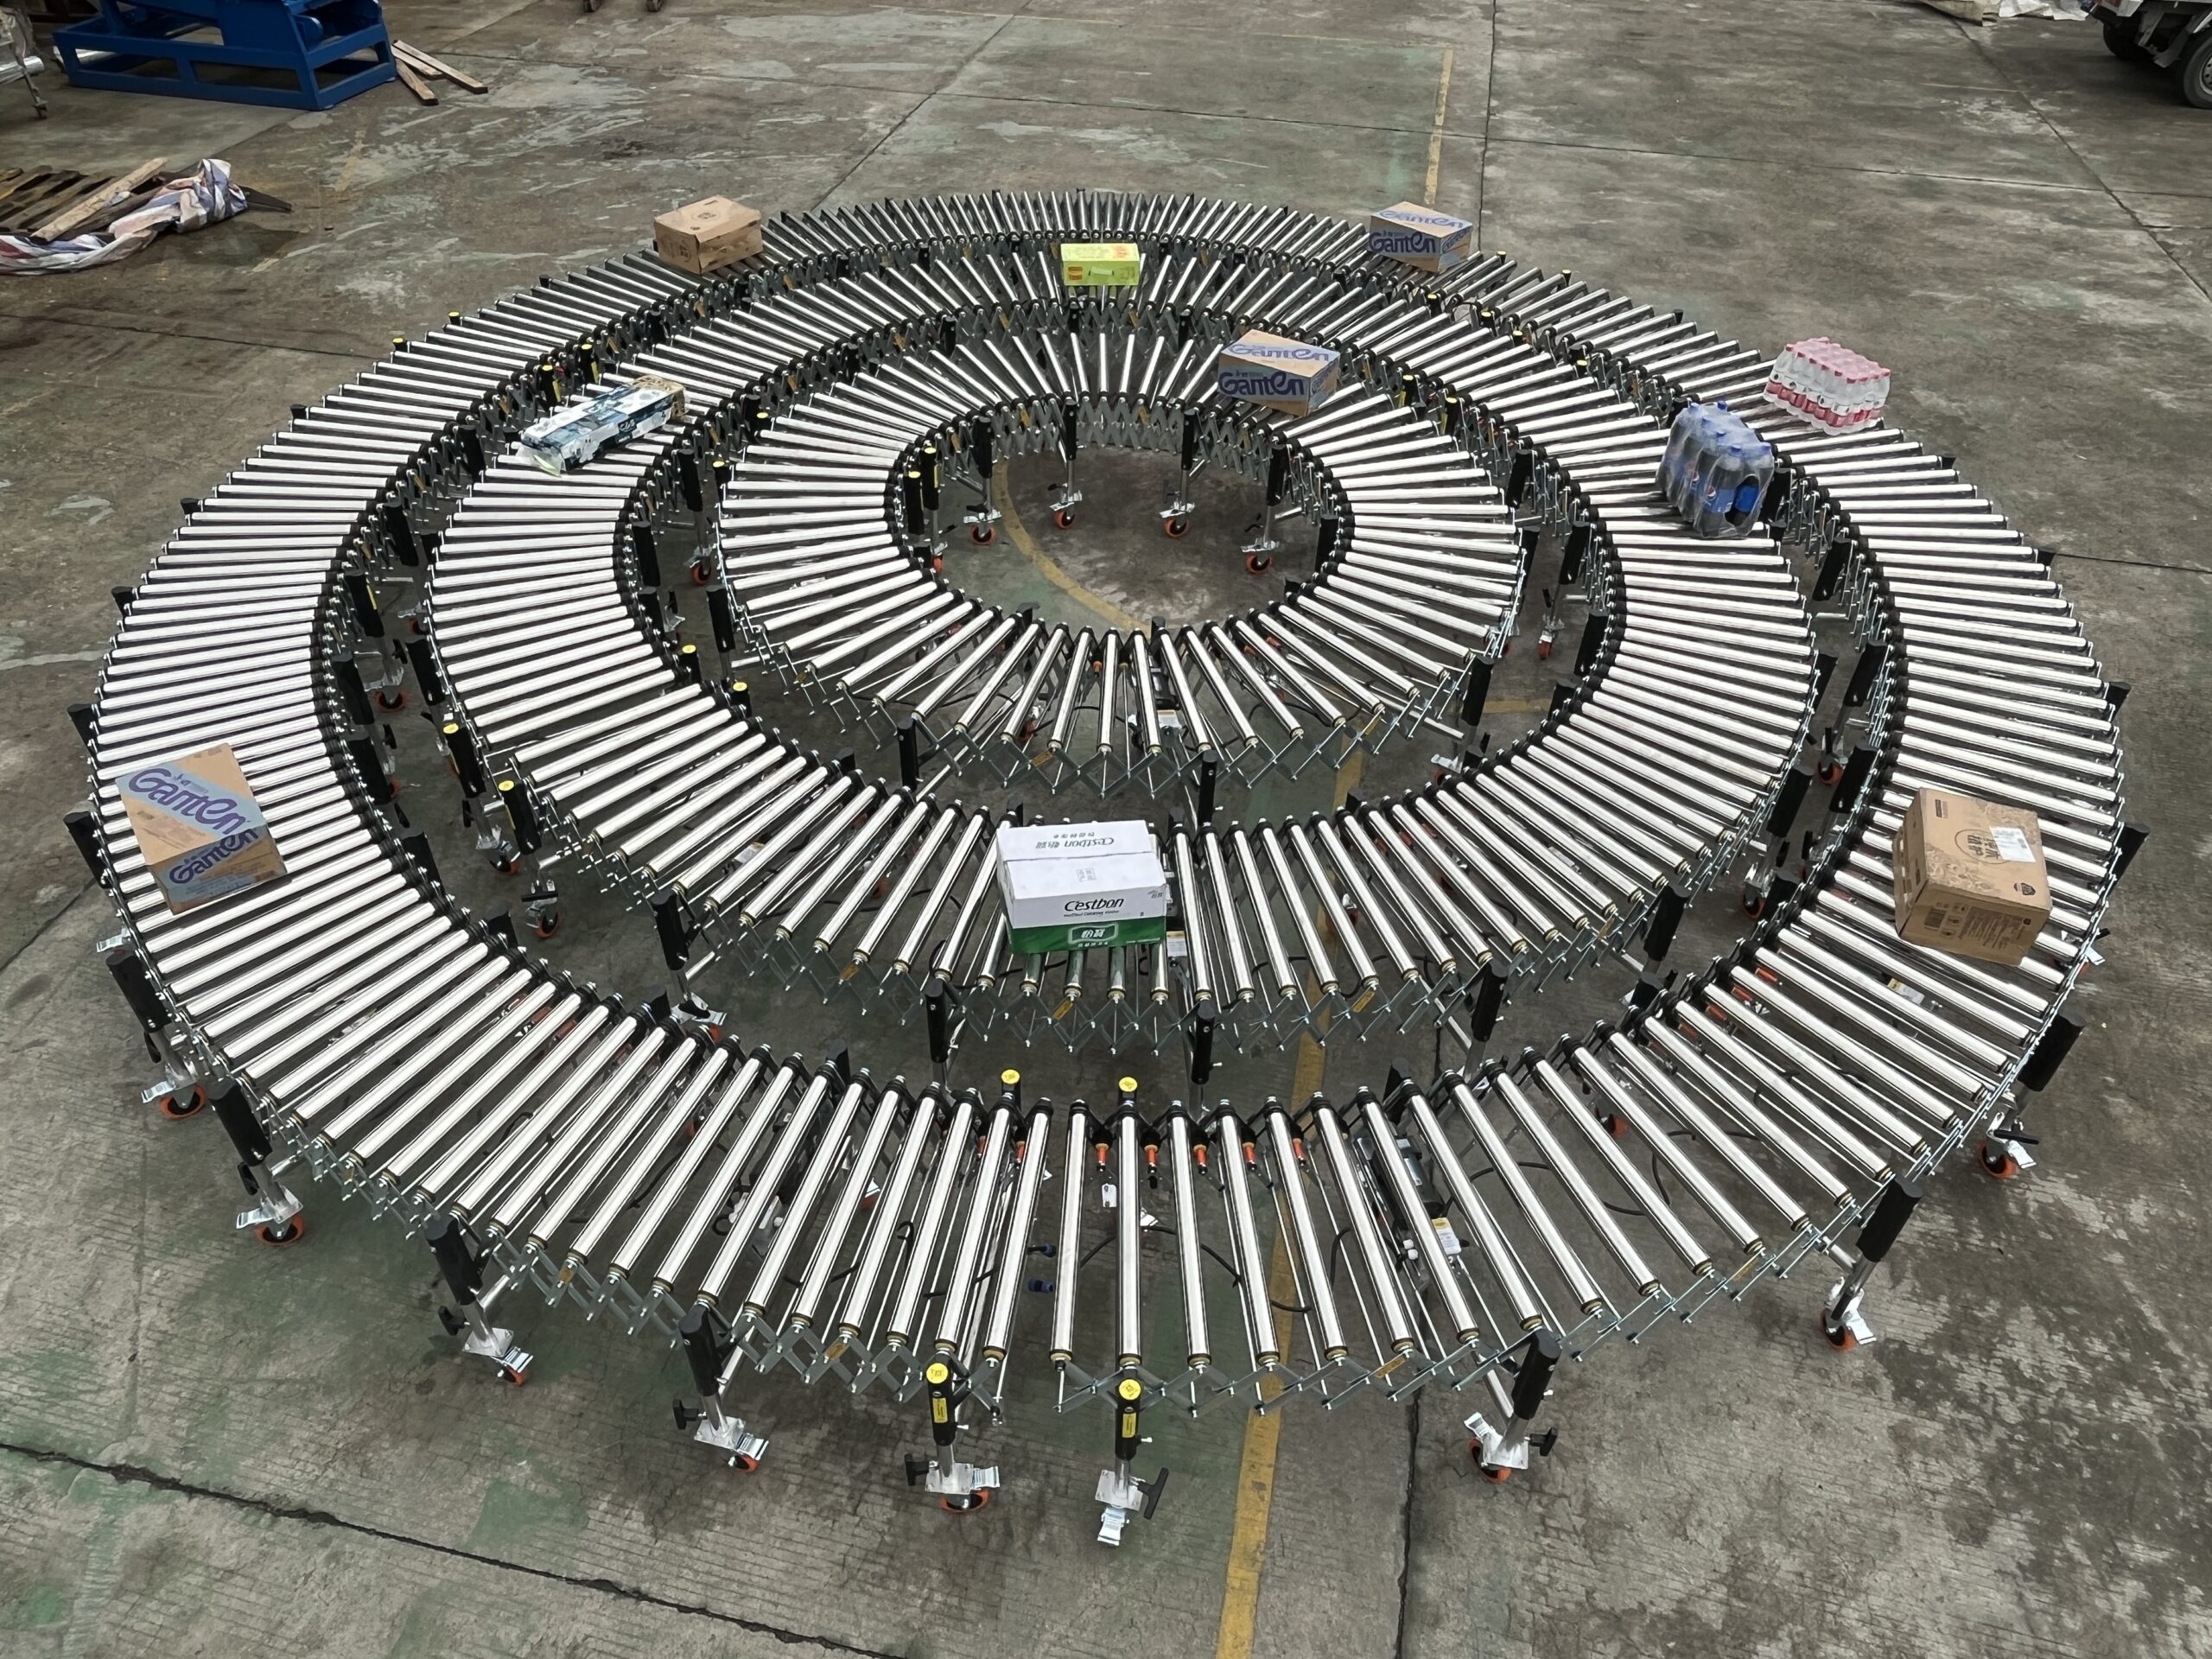
U-Turn Configurations
U-turns create 180-degree direction changes, useful for:
- Returning items to previous workstations
- Creating compact sorting loops
- Maximizing conveyor length in confined spaces
- Creating recirculation paths
- Creating effective U-turns:
- Form a continuous curve using 5-7 sections
- Maintain a minimum inner radius based on package size
- Use skate wheel conveyors for tighter turns when possible
- Consider using wider conveyors for stability through the turn
- Flow considerations:
- Create a slightly steeper incline for the entry to the turn
- Add guide rails on both sides through the entire turn
- Test thoroughly with various package sizes
- Consider adding slight declines between sections
- Space optimization:
- For extremely tight spaces, use multiple 90-degree turns instead of a single U-turn
- Consider nested conveyor paths for maximum space efficiency
- Use the tightest possible turn radius that packages can navigate
With creative application of these techniques, nearly any warehouse layout challenge can be addressed with modular flexible conveyors.
Design the precise workflow your space requires with Naili’s modular systems
Implementing flexible corner conveyor solutions with Naili’s modular systems allows you to create custom material flow paths that work within your unique space constraints while optimizing operational efficiency.
The key advantages of this approach include:
Layout Flexibility:
- Design conveyor paths that follow your optimal workflow, not vice versa
- Navigate around columns, workstations, and other obstacles
- Easily reconfigure as seasonal or operational needs change
- Create temporary pathways for special projects or peak periods
- Test different configurations before committing to permanent installations
Operational Benefits:
- Reduce material handling distances by creating direct routes
- Minimize manual intervention points in the material flow
- Improve throughput by maintaining continuous product movement
- Better space utilization with tight turns and adaptive configurations
- Easy scalability as your operation grows or changes
Implementation Advantages:
- Minimal tools required for setup and reconfiguration
- No special engineering expertise needed
- Quick deployment and adjustment
- Reasonable initial investment compared to fixed systems
- Lower total cost of ownership through reusability and adaptability
By leveraging the natural flexibility of Naili’s roller and skate wheel conveyor designs, you can create adaptable warehouse layout planning solutions that bend to your operational needs rather than forcing your operation to conform to rigid infrastructure limitations.
Whether navigating around obstacles, connecting workflow zones, or maximizing space utilization, the ability to create corners and curves in your conveyor system provides the foundation for truly optimized material handling.
Frequently Asked Questions
What is the minimum turning radius possible with flexible conveyors?
The minimum turning radius depends on your conveyor type, width, and package size. For Naili’s Gravity Skate Wheel Conveyor (500mm width), turns as tight as 1.2m radius are possible. Roller conveyors typically require larger radii, with 38mm rollers allowing approximately 1.5m minimum radius and 50mm rollers needing about 1.8m. Always test with your largest packages to ensure smooth flow through turns.
Can packages of different sizes navigate the same curved conveyor sections?
Yes, with proper setup. Design your curves based on your largest package dimensions, install guide rails on both sides of the curve, and ensure sufficient decline to maintain momentum. Mixed package operations may require additional incline and regular testing to ensure smaller packages don’t get stuck while larger ones maintain proper flow. For diverse package operations, skate wheel conveyors often provide better performance through turns.
Do I need to add extra supports when creating curved sections?
For standard curves with properly adjusted legs, no additional supports are typically needed. However, for heavily loaded conveyors or sections with significant extension, adding support legs at the midpoint of the outer edge of the curve can provide extra stability. Ensure all existing legs are perpendicular to the floor and lock all casters when the conveyor is in position.
How do I prevent packages from falling off the conveyor at turns?
Install guide rails along the outer edge (and optionally the inner edge) of curves. For improvised solutions, adjustable C-clamp-mounted guide rails work well. For heavier packages, consider using side guides on both sides of the curve. Ensure the outer rail height is sufficient for your tallest package and check that the rails are smooth with no protrusions that could snag packages.
Can powered roller conveyors be used in curved configurations?
Naili’s powered roller conveyors are designed primarily for straight-line applications due to their drive belt configuration. For corner configurations, the recommended approach is to use powered sections before and after gravity corner sections. This creates a hybrid system where powered conveyors handle horizontal transport and gravity sections manage the turns. Ensure proper speed synchronization between powered and gravity sections for smooth transitions.