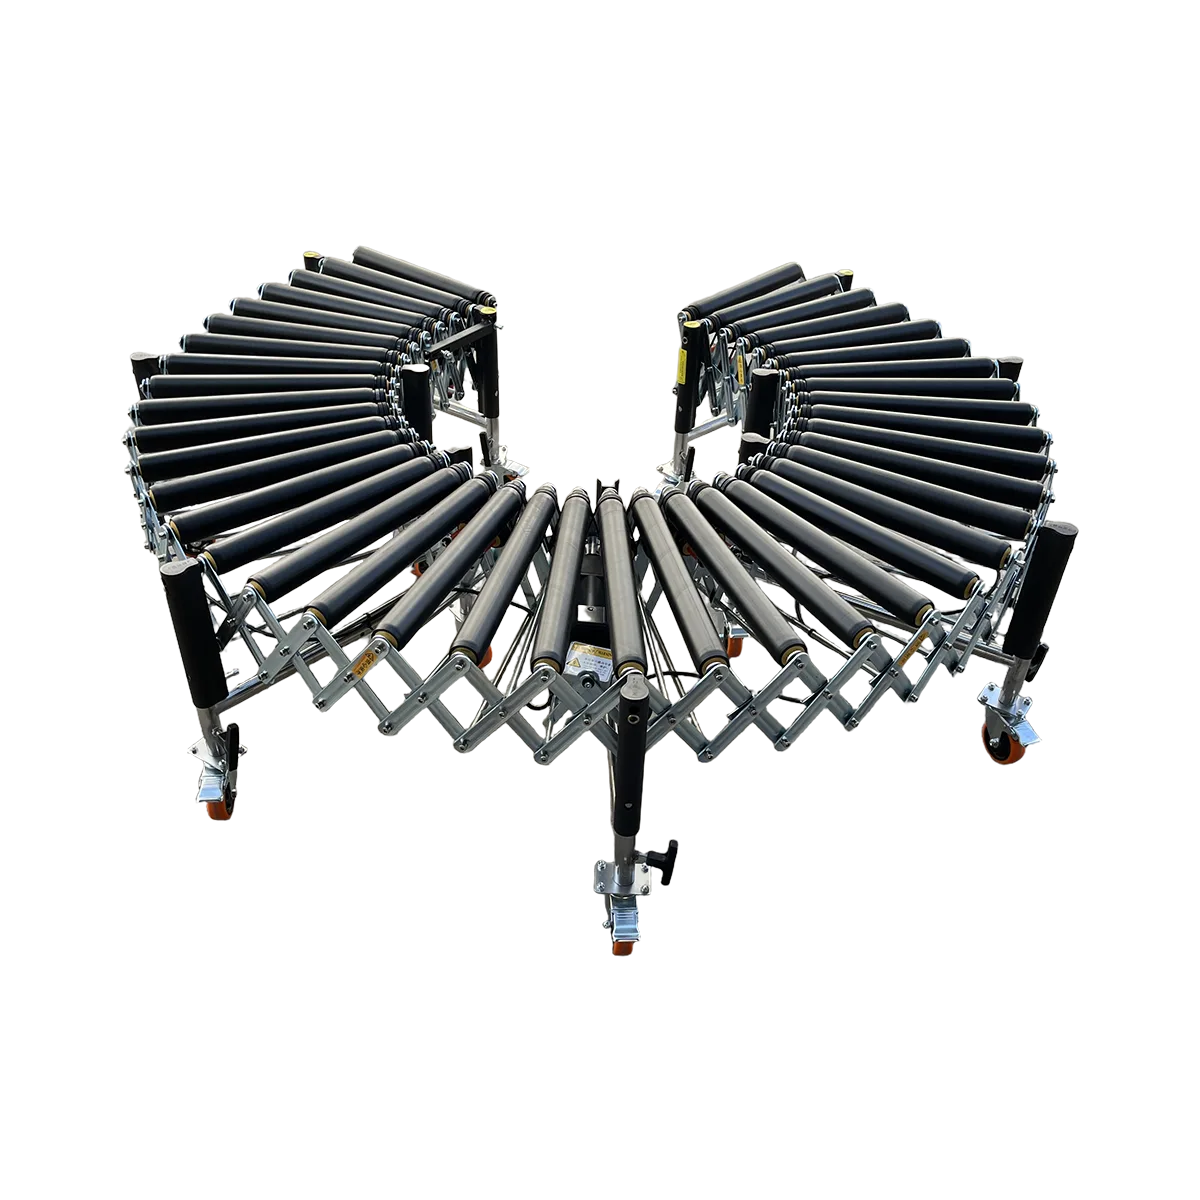
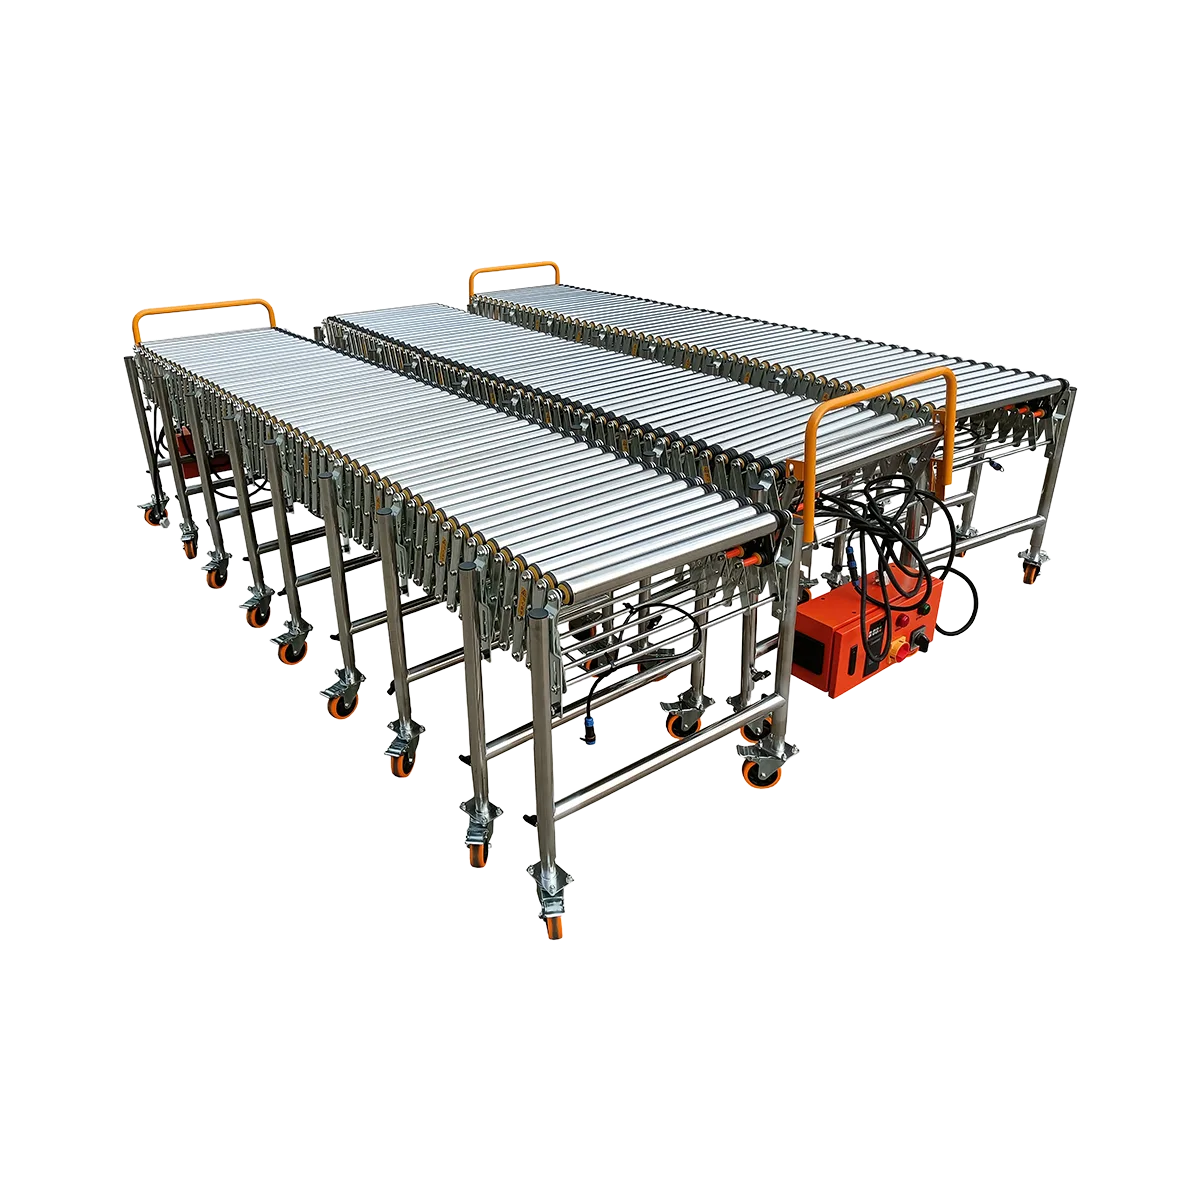
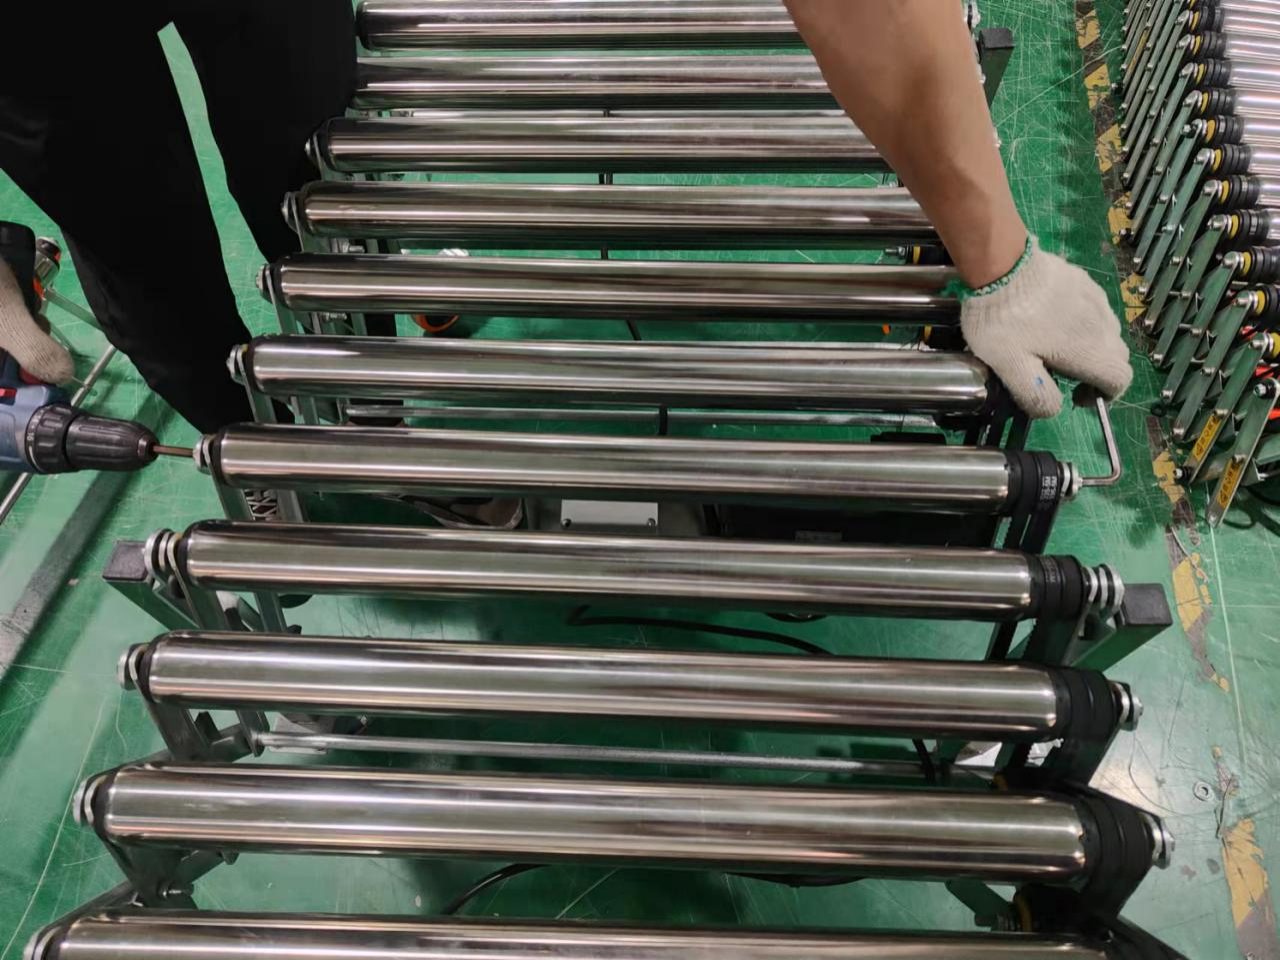
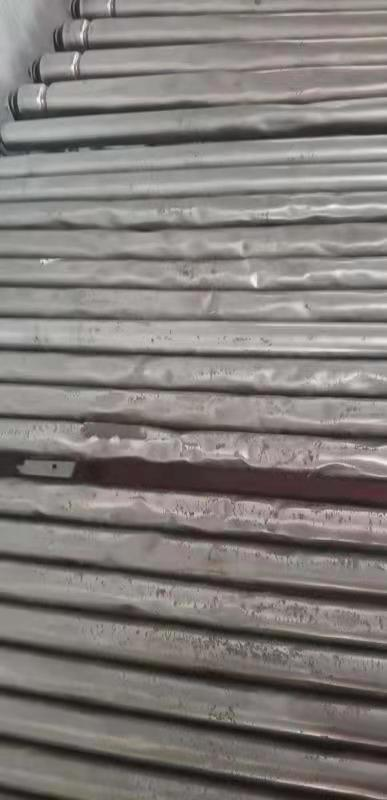
- Powered Rubber Roller Conveyor – Multi-wedge Belt Driven – 1100 mm/Section

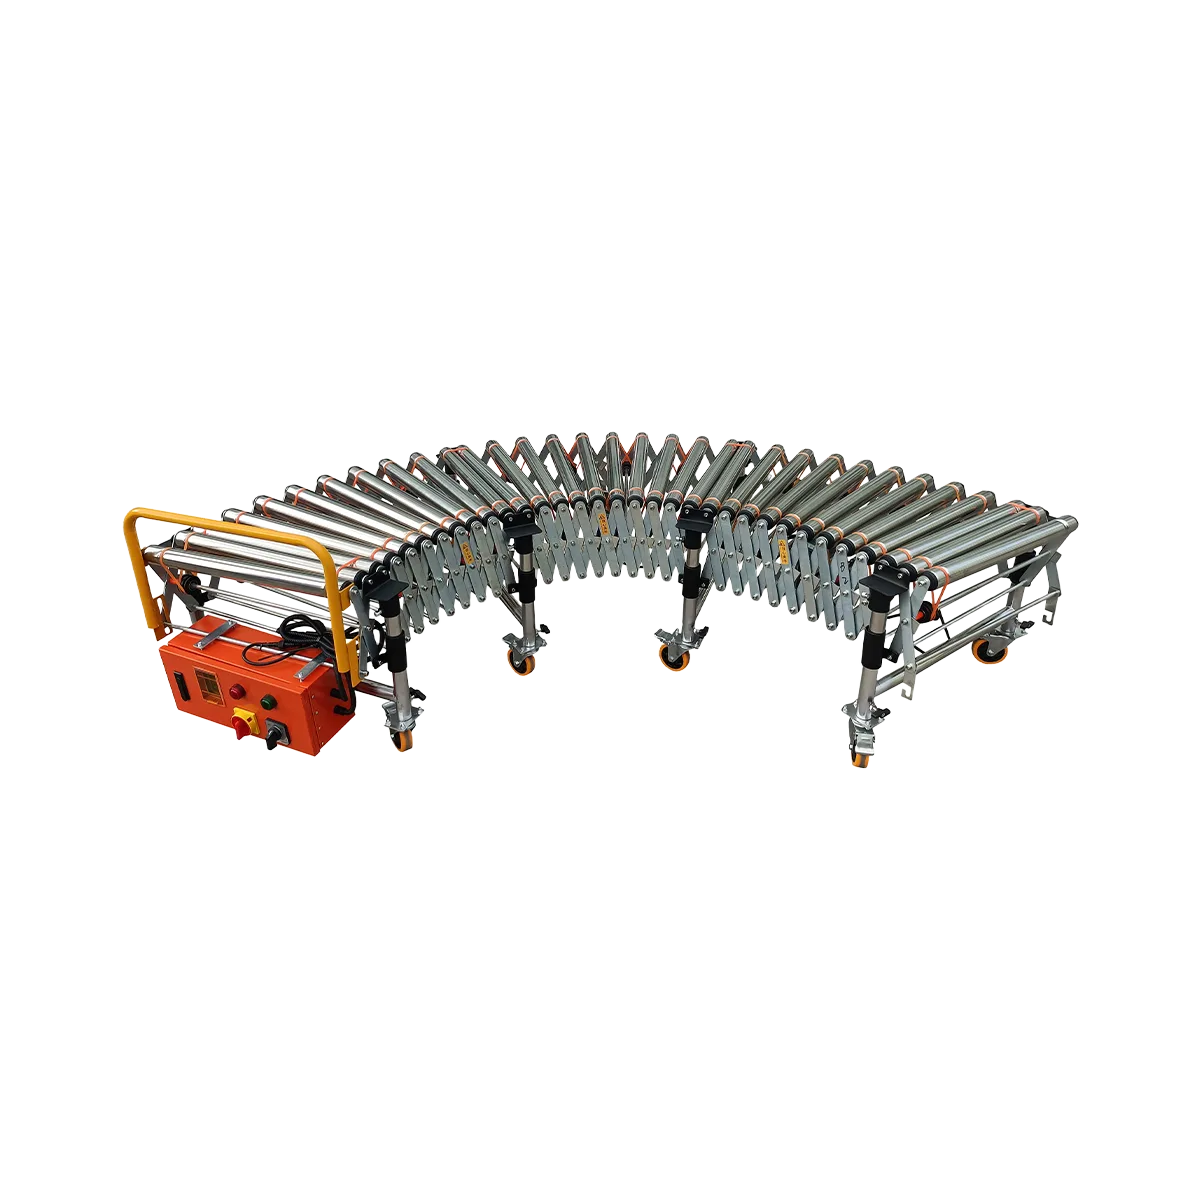
- Powered Roller Conveyor – O-shaped Belt Driven – 1500 mm/Section
- Powered Roller Conveyor – Multi-wedge Belt Driven – 2000 mm/Section
- Powered Roller Conveyor – Multi-wedge Belt Driven – 3000 mm/Section
Preface
Thank you for choosing Naili Conveyor’s range of retractable flexible roller conveyor products. To ensure proper and reliable operation of the machine, please thoroughly read this instruction manual before use. While we continuously improve the performance and quality of our products, we welcome your feedback regarding any quality concerns or suggestions for improvement during the usage process. We sincerely appreciate and will implement suitable suggestions to enhance our products.
Before operating the equipment, operators should carefully review the technical specifications and operating conditions. While our conveyor systems are engineered for stability, incorrect installation or operation may cause certain functions to malfunction, which might be mistaken for equipment failure. When encountering problems, first verify proper installation and usage, then carefully observe the machine’s behavior to identify potential causes. If issues persist, please contact our support team for professional assistance. Please note that Naili Conveyor cannot assume liability for safety concerns arising from improper operation, maintenance, or repair, even if specific warnings are not included in this manual.
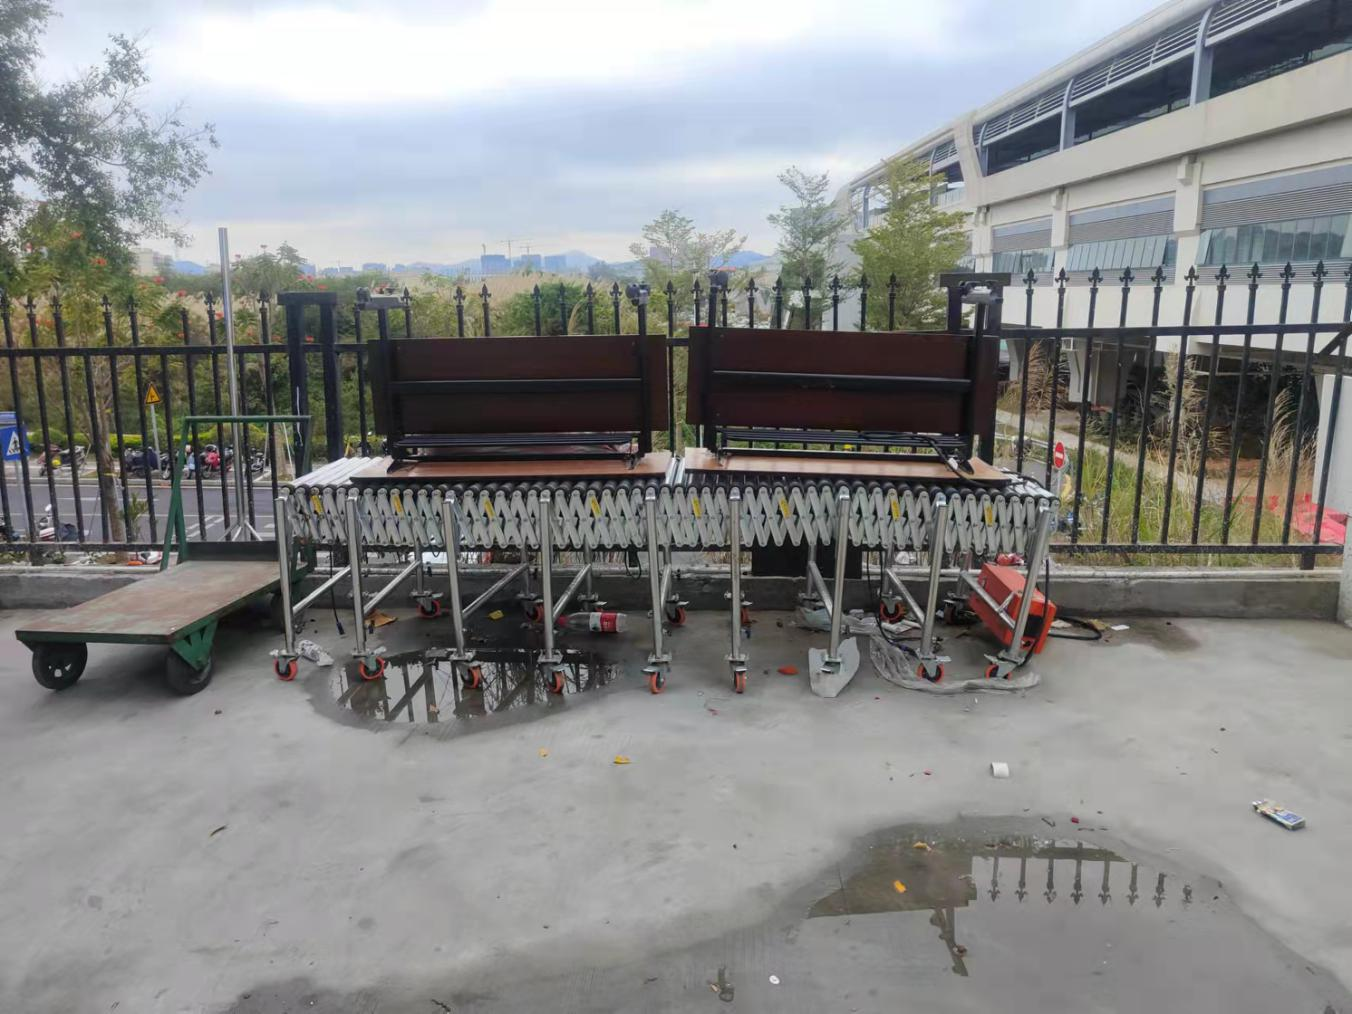
The Handling and Transportation Process
- Avoid repeated swinging and collisions when moving and lifting the retractable flexible roller conveyor.
- To prevent damage to the conveyor and its components, handle with care and avoid heavy pressure.
- Normal loading and unloading of equipment should be carried out using a power forklift.
- Upon receipt, please inspect for any damage that may have occurred during transportation and inform us promptly of any issues.
Installation Notes
Avoid Installation Situations
- Areas with direct sunlight exposure (affects motor heat dissipation)
- Areas exposed to rain, dripping pipes, or moisture (can cause motor short circuits and machine rusting)
- Places surrounded by flammable gases or items
- Areas with chemical gases or corrosive environments (such as electroplating ponds, electrolysis tanks)
Instructions for the Use of the Powered Flexible Roller Conveyor
This section covers the proper operation and maintenance procedures for your flexible roller conveyor system to ensure optimal performance and longevity.
Installation and Maintenance
Proper installation and regular maintenance are essential for ensuring the safe and efficient operation of your flexible roller conveyor. This section outlines key maintenance procedures.
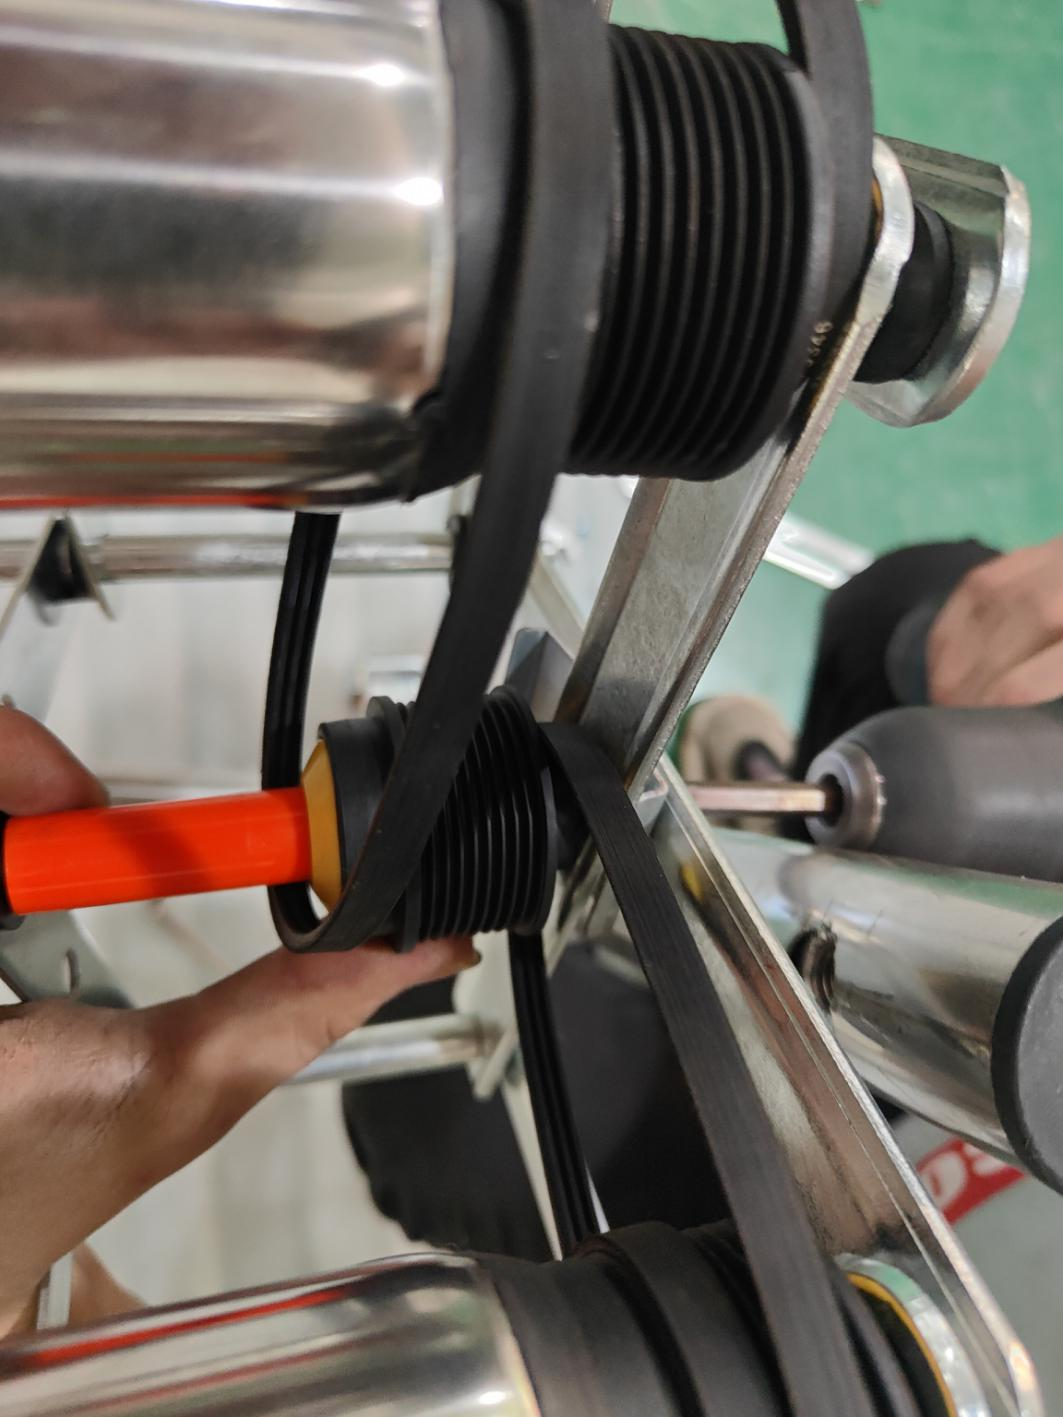
Replacement of Motors and Belts
- First, remove the screws on the fixed motor frame to facilitate the next step of dismantling the motor screws

1. Remove motor frame screws
- Remove only half of the motor screws, not all of them, to avoid difficulties when remounting

2. Loosen half of motor screws


- Move the motor back to create sufficient space for belt replacement

3. Move motor to create belt space
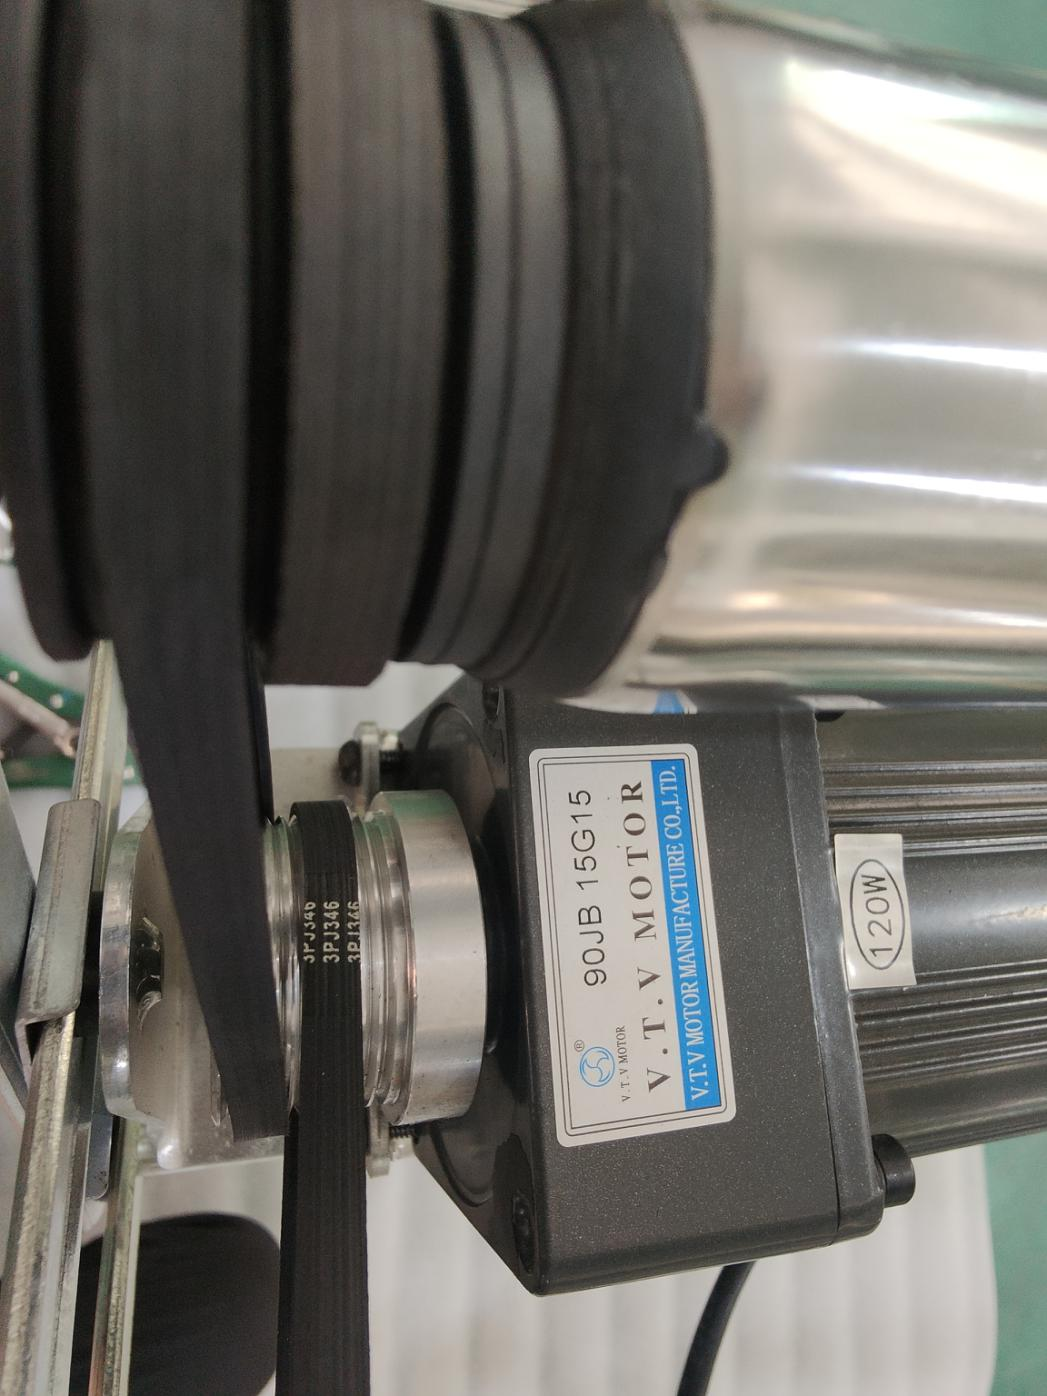
- Use a hex screwdriver to remove the belt from both ends

4. Use hex wrench to remove belt
- Remove the belt at the opening, return the motor to the correct position, and secure it
5. Remove belt and reposition motor
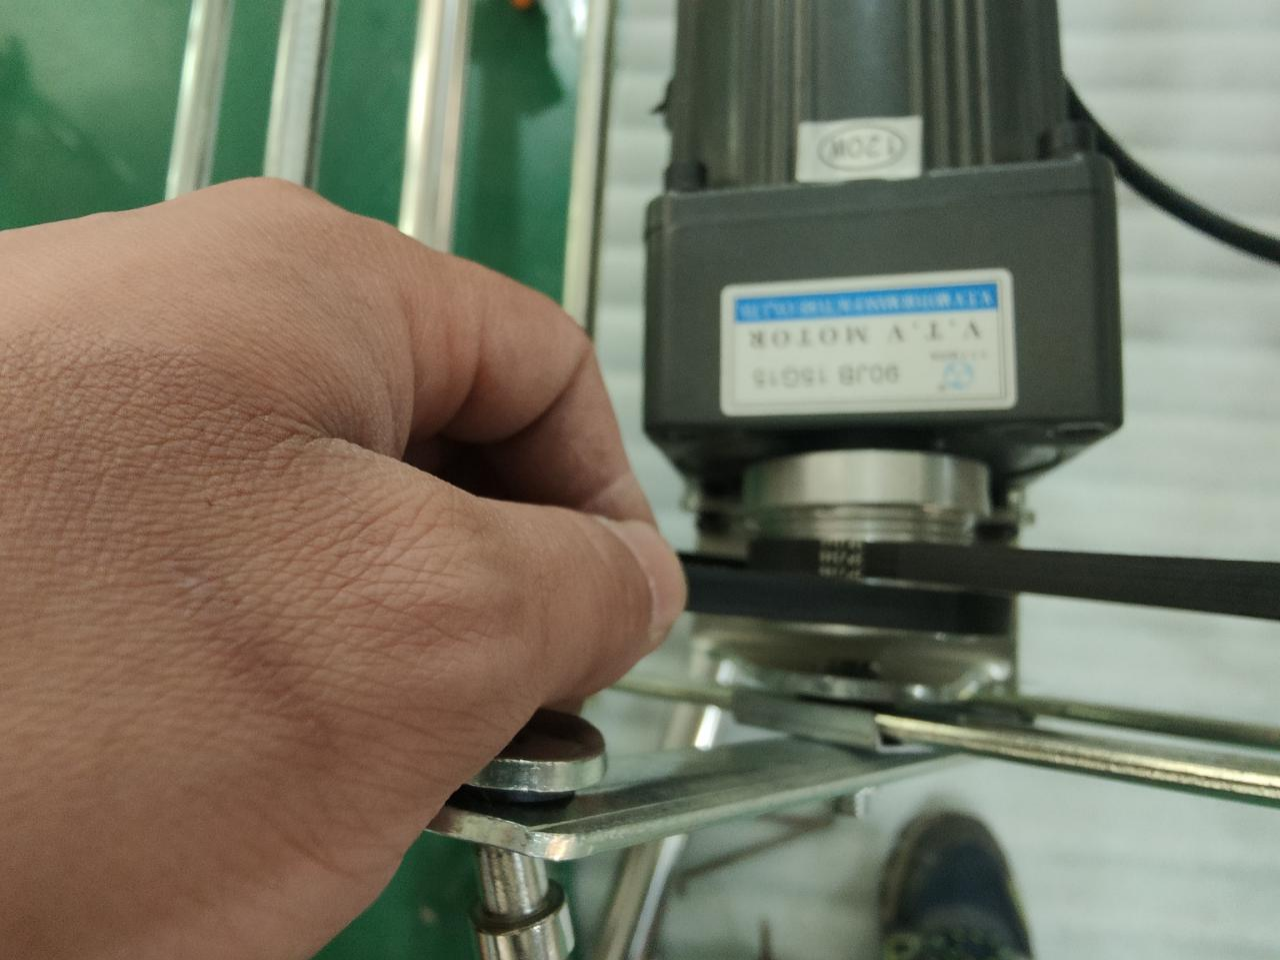
- Remember to reinstall the pads when remounting the tumbler
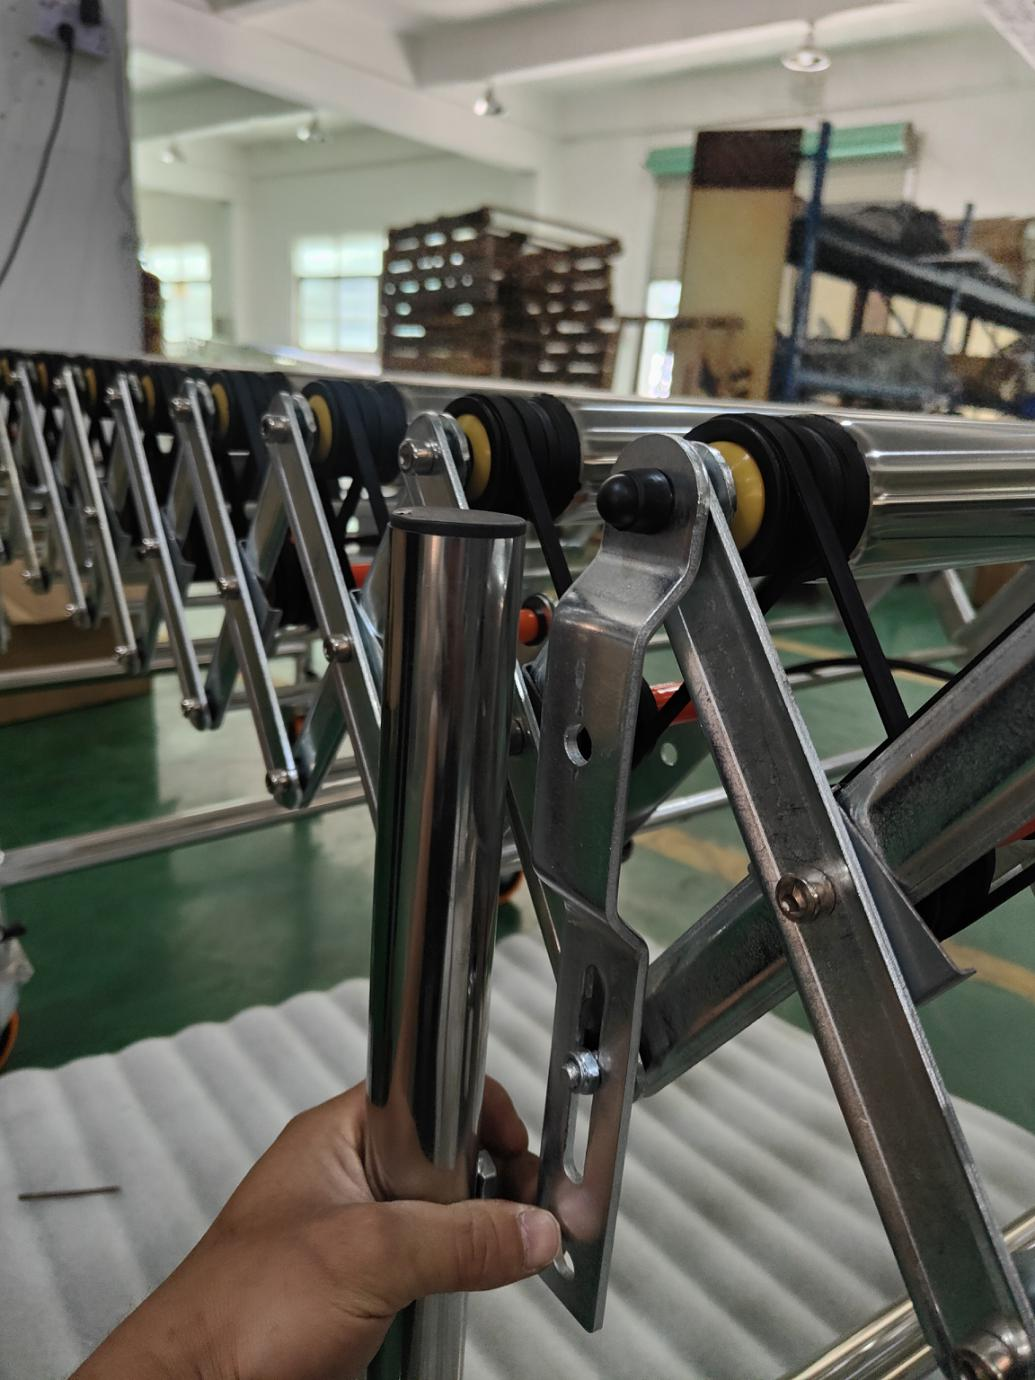
Scaffolds and Belts
- First remove the screws on the scaffold housing
1. Remove scaffold housing screw
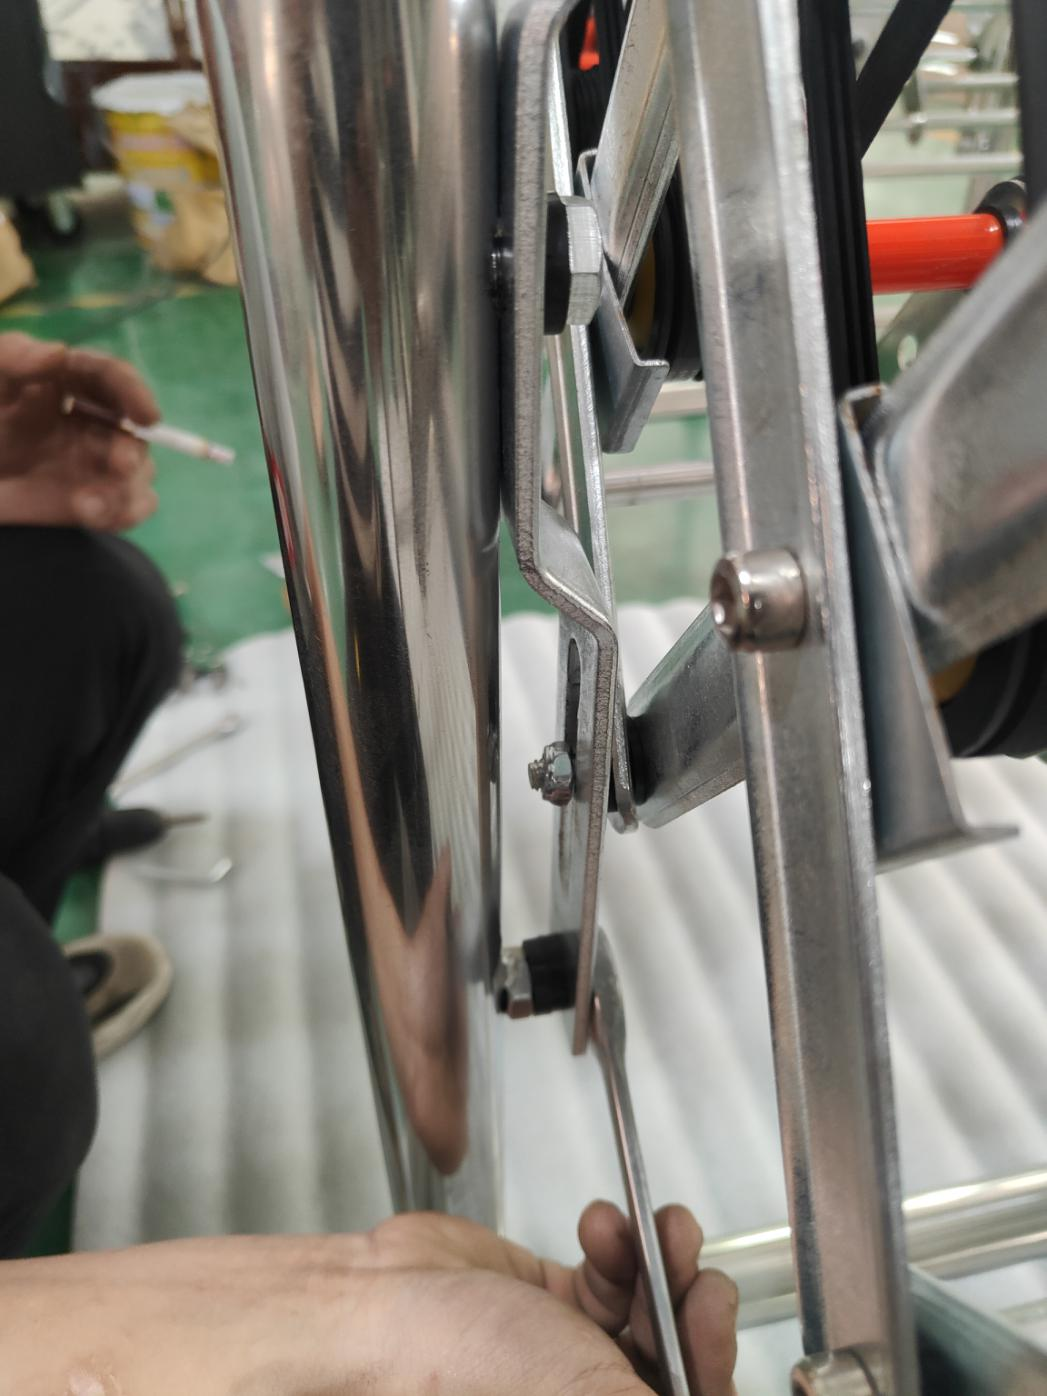
- Remove the fixing film carefully without disturbing other parts

2. Remove fixing film carefully
- Remove the screws on the retractable section and replace the belt

3. Remove retractable screw and change belt
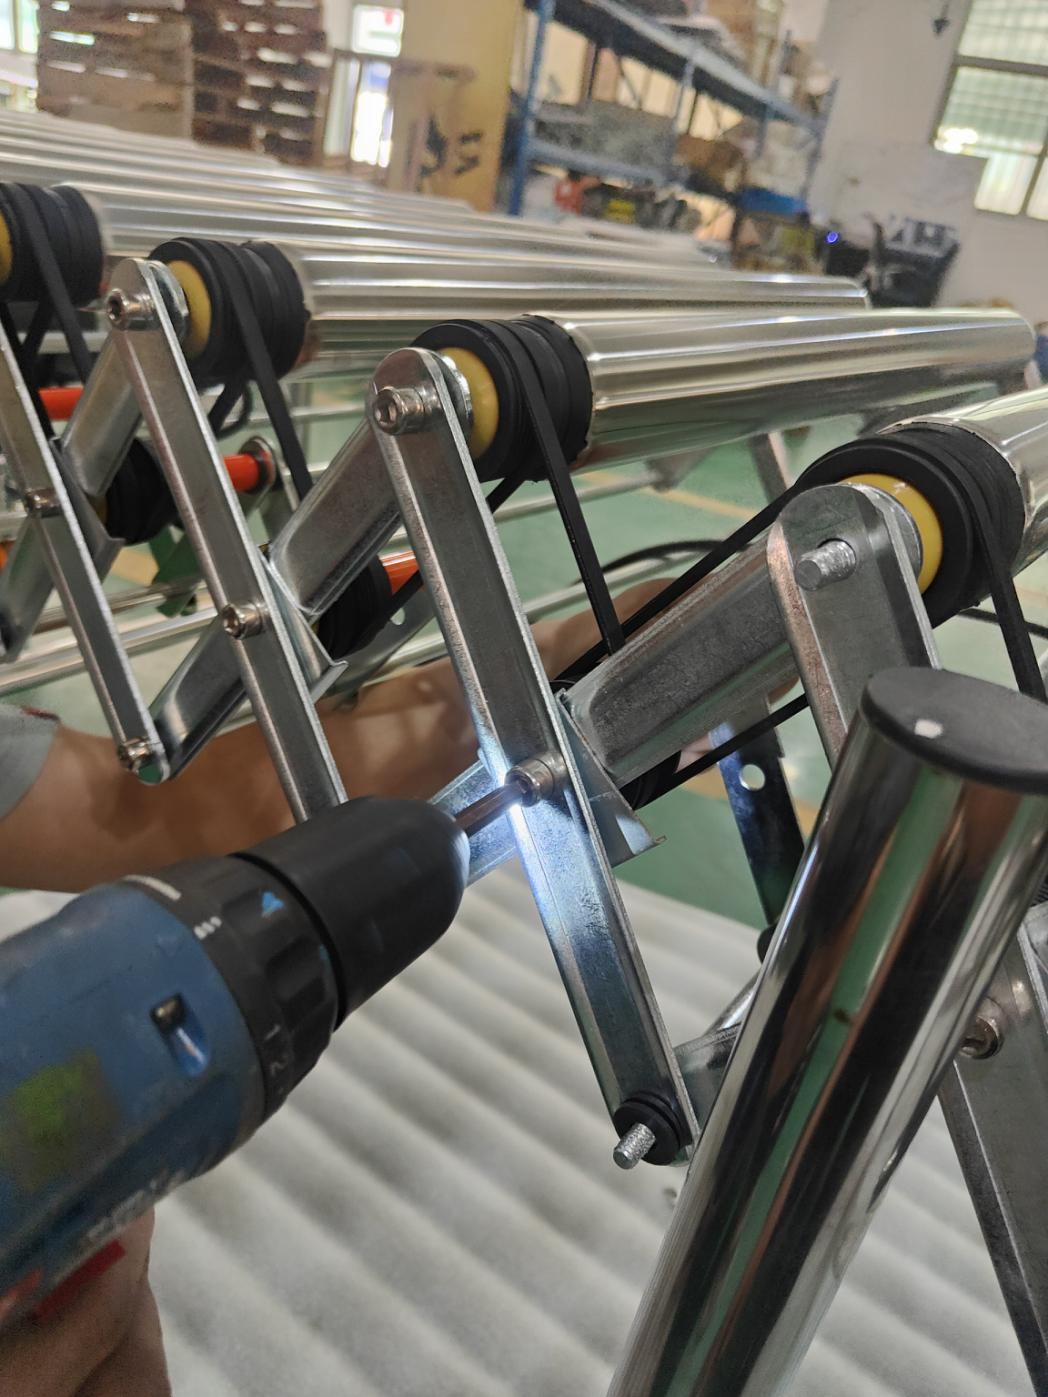
- When securing the screws, don’t place the belt on the wheel initially. Position it on both sides of the wheel, secure the screws, and then reposition the belt

4. Lock screw before placing belt on wheel
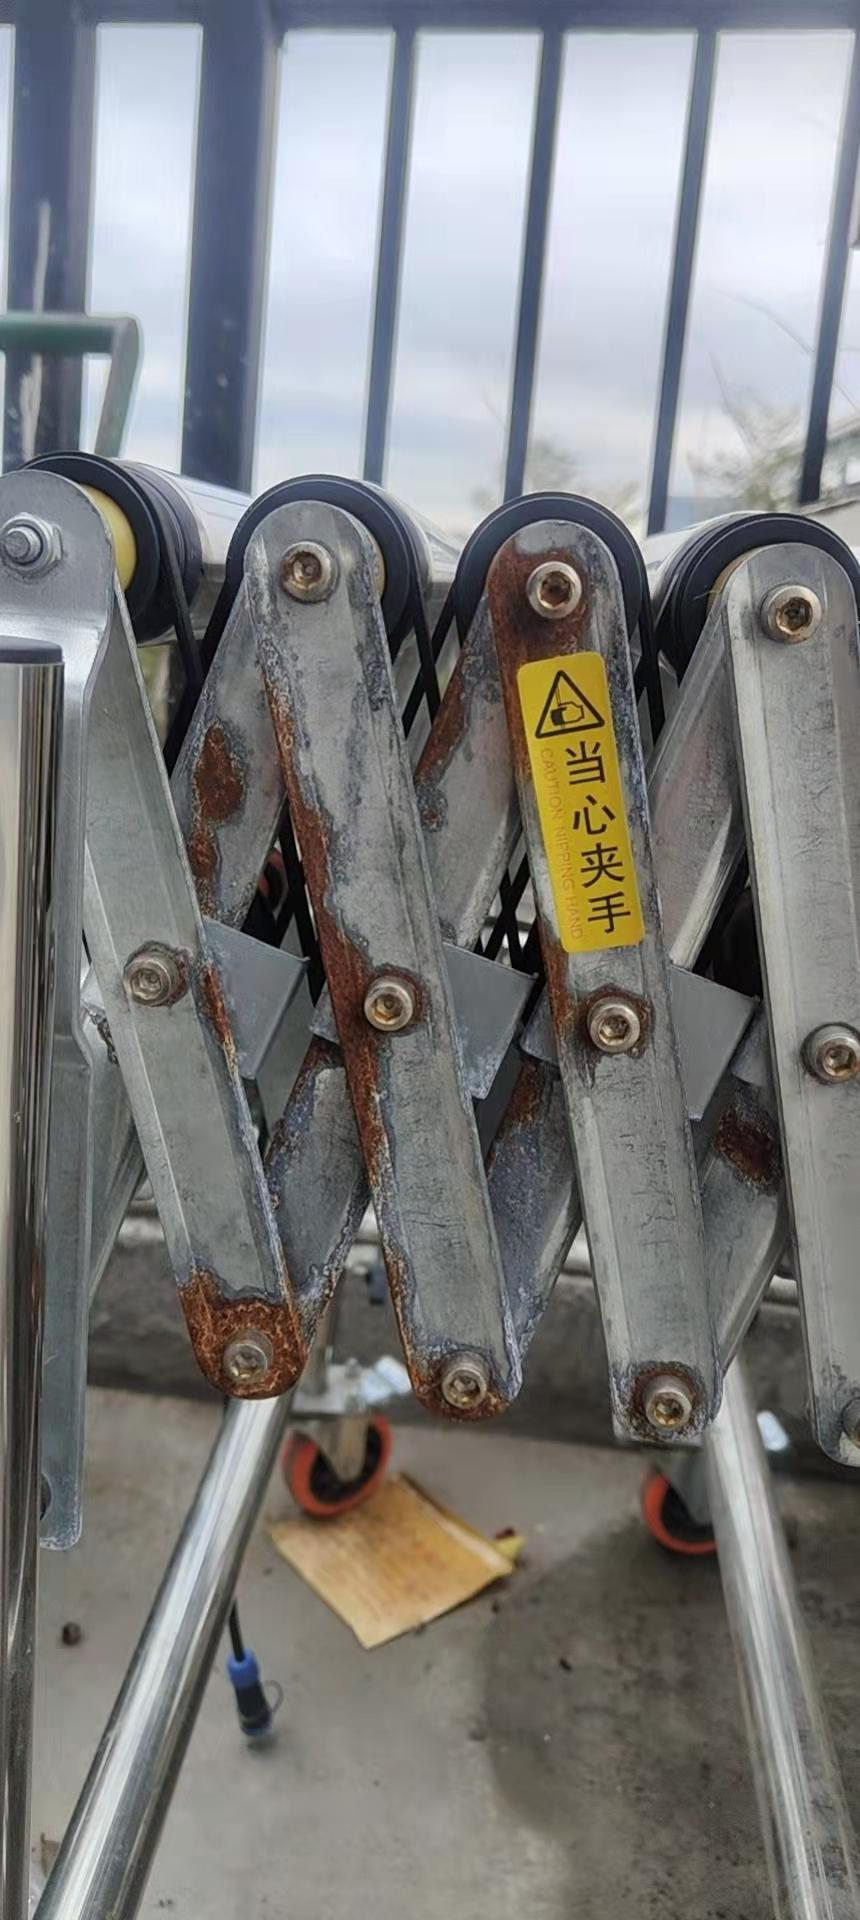
Important Maintenance Note: For conveyors that are frequently moved and extended, inspect all screws and wiring connections every 3 months. Promptly tighten any loose components to ensure safe and efficient operation.
Warnings About Use
- If the equipment is stored outdoors, ensure proper rain protection. Never leave it exposed to direct moisture.

1. Ensure rainwater protection for outdoor storage
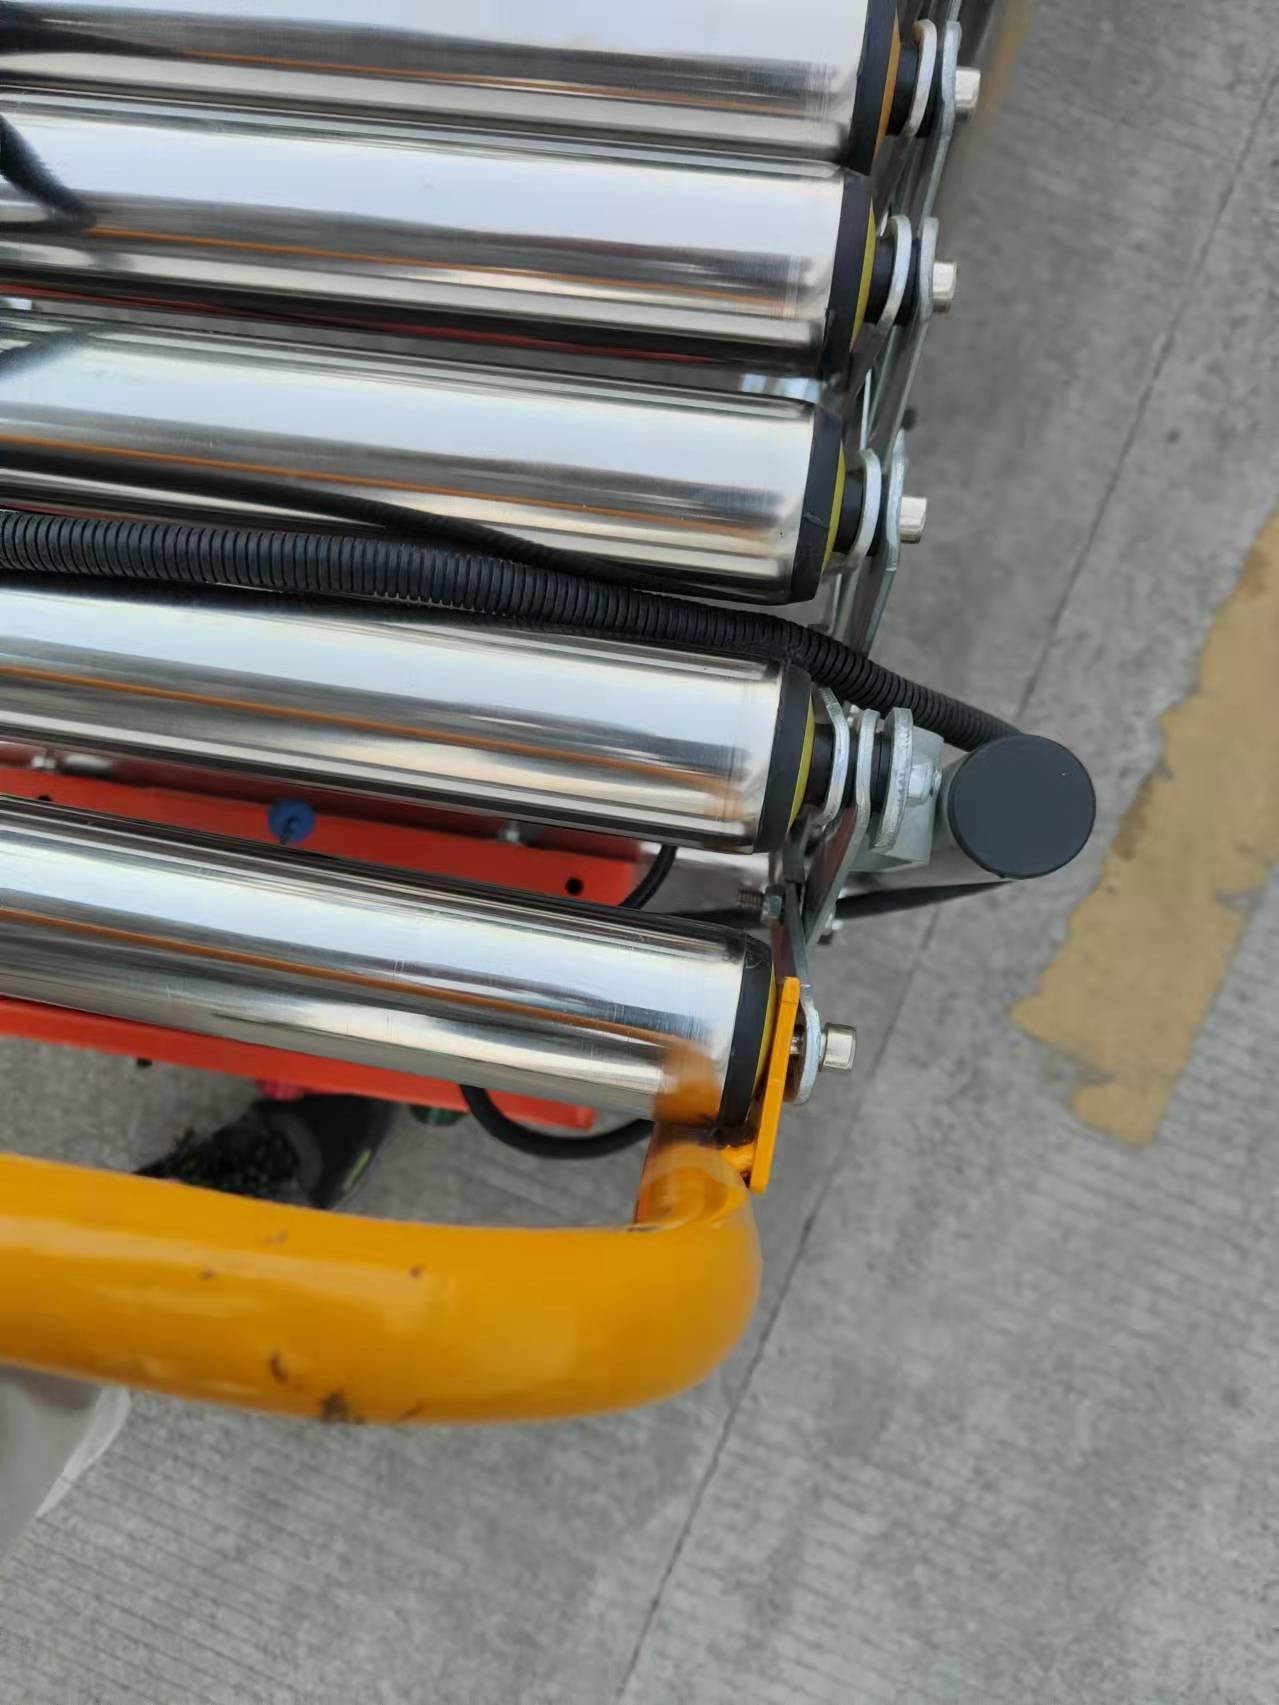
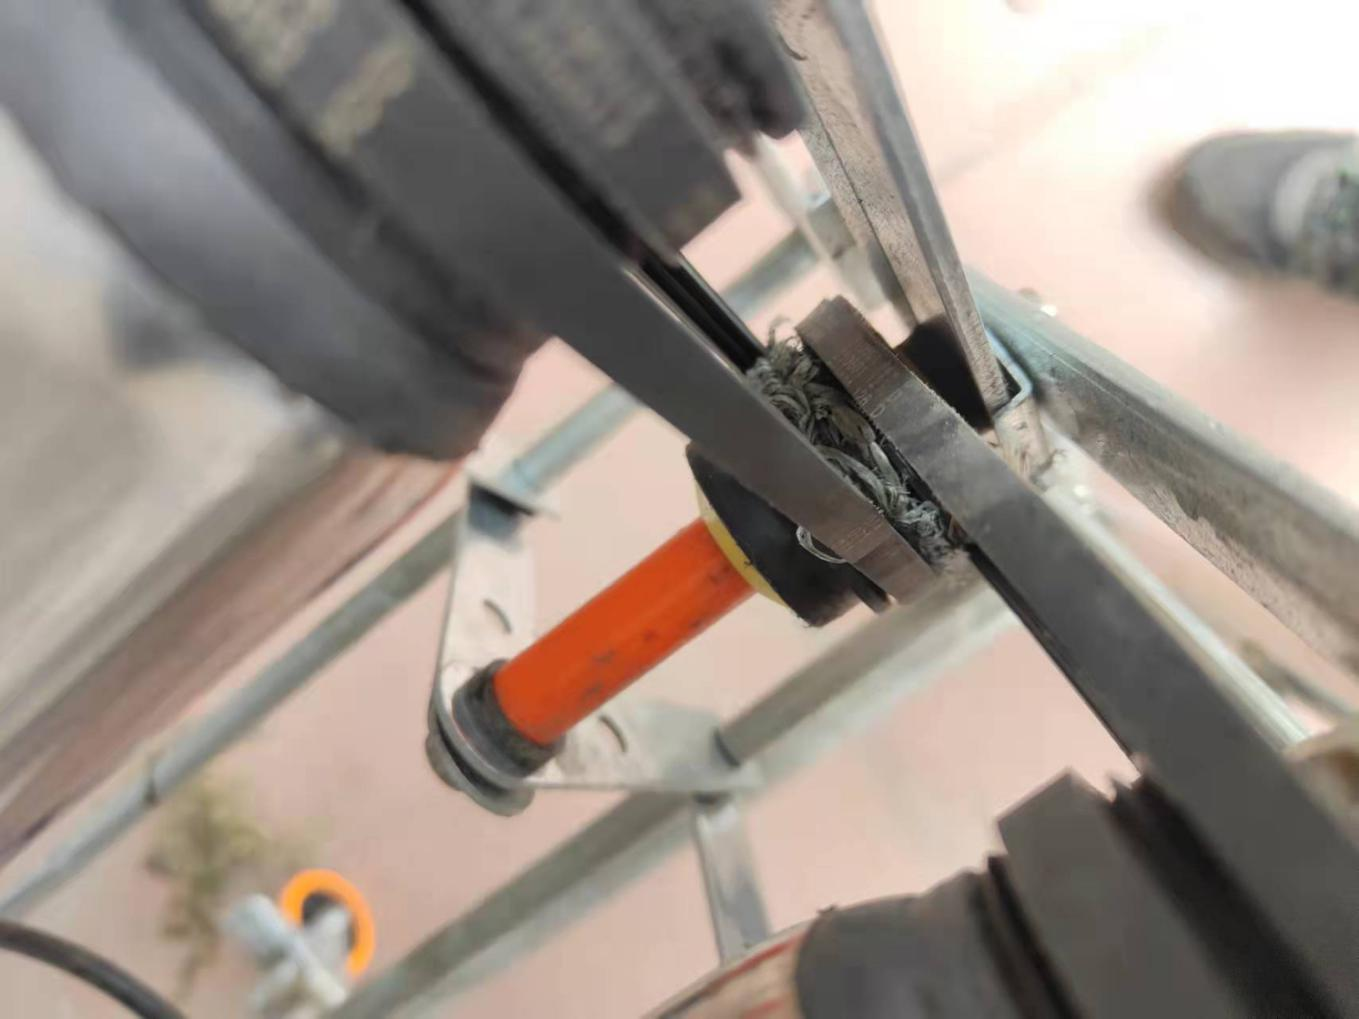
- After use, properly secure the power cord and keep it away from rollers to prevent entanglement during movement.

2. Pack power cord away from rollers
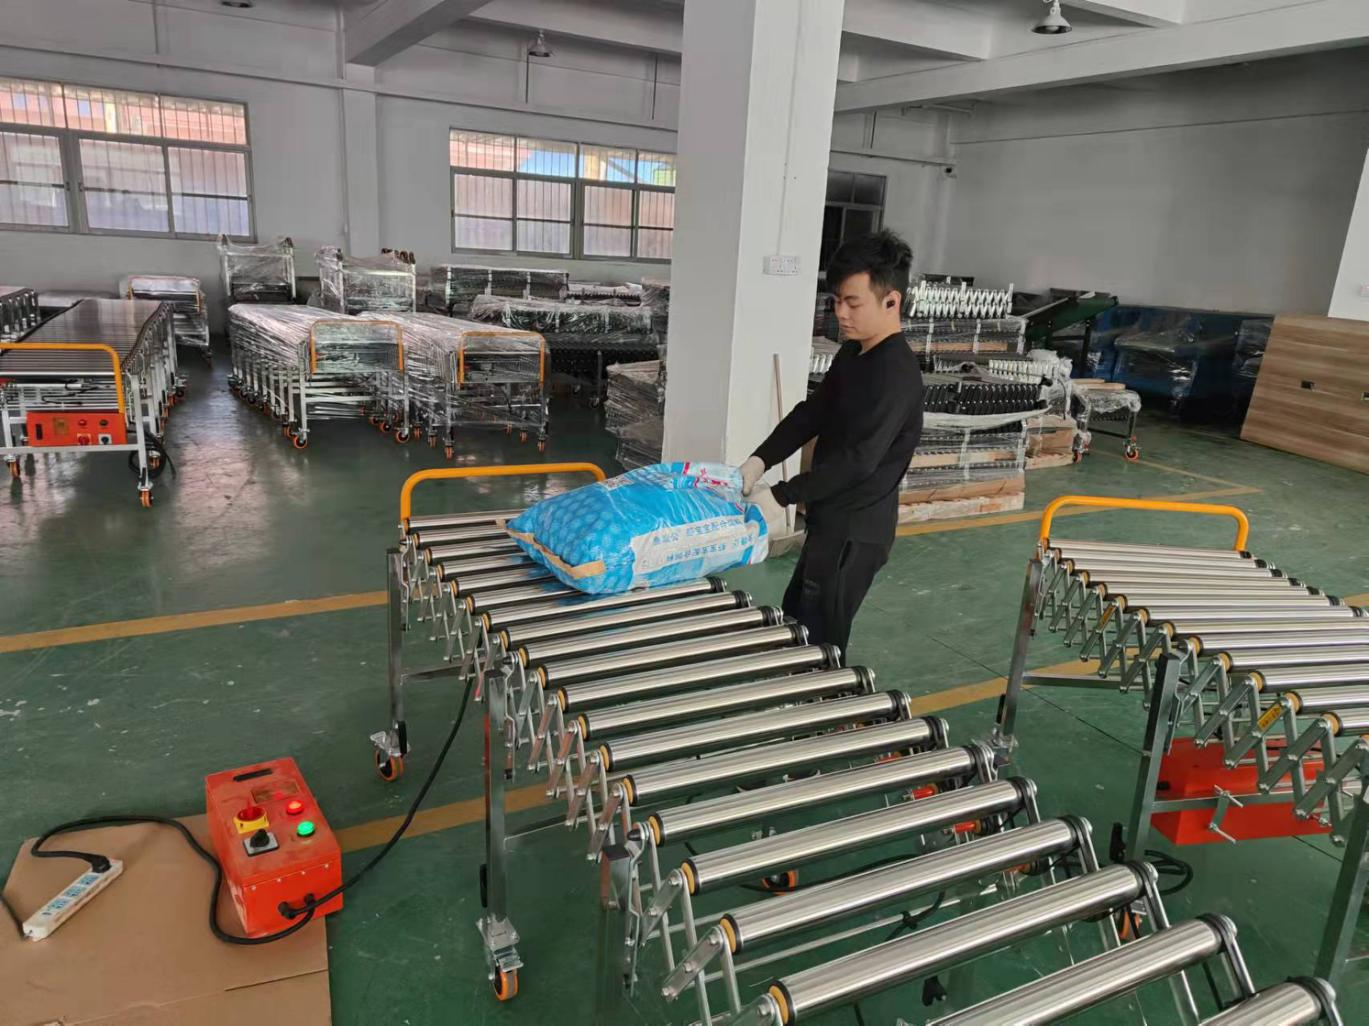
- Handle cargo carefully during loading and unloading operations. Avoid collisions when moving equipment. Never throw goods directly onto the conveyor.

3. Handle cargo gently, avoid collisions
- When loading and unloading cargo, avoid pulling on the side of the belt, as this can cause belt misalignment and damage.

4. Do not tug belt sides during loading
- Protect the control box from water exposure. Water infiltration can create serious electrical hazards.

5. Protect control box from water
- Take precautions against corrosion and moisture.

6. Prevent corrosion and moisture
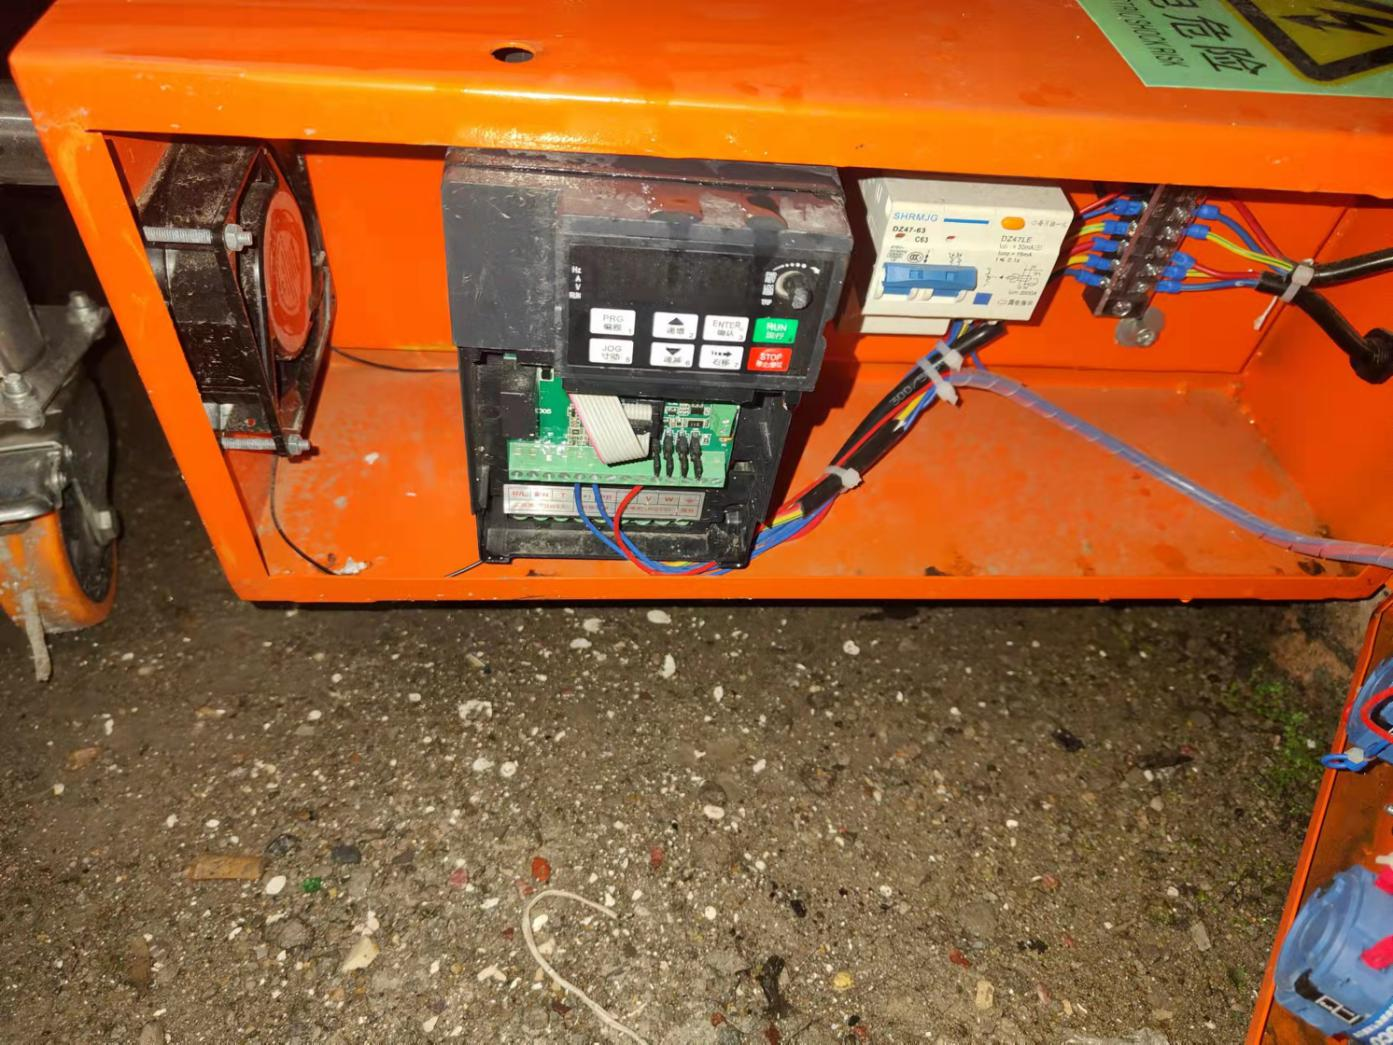
- Do not alter the frequency converter parameters, as this may render the equipment inoperable.

7. Avoid pressing frequency converter buttons
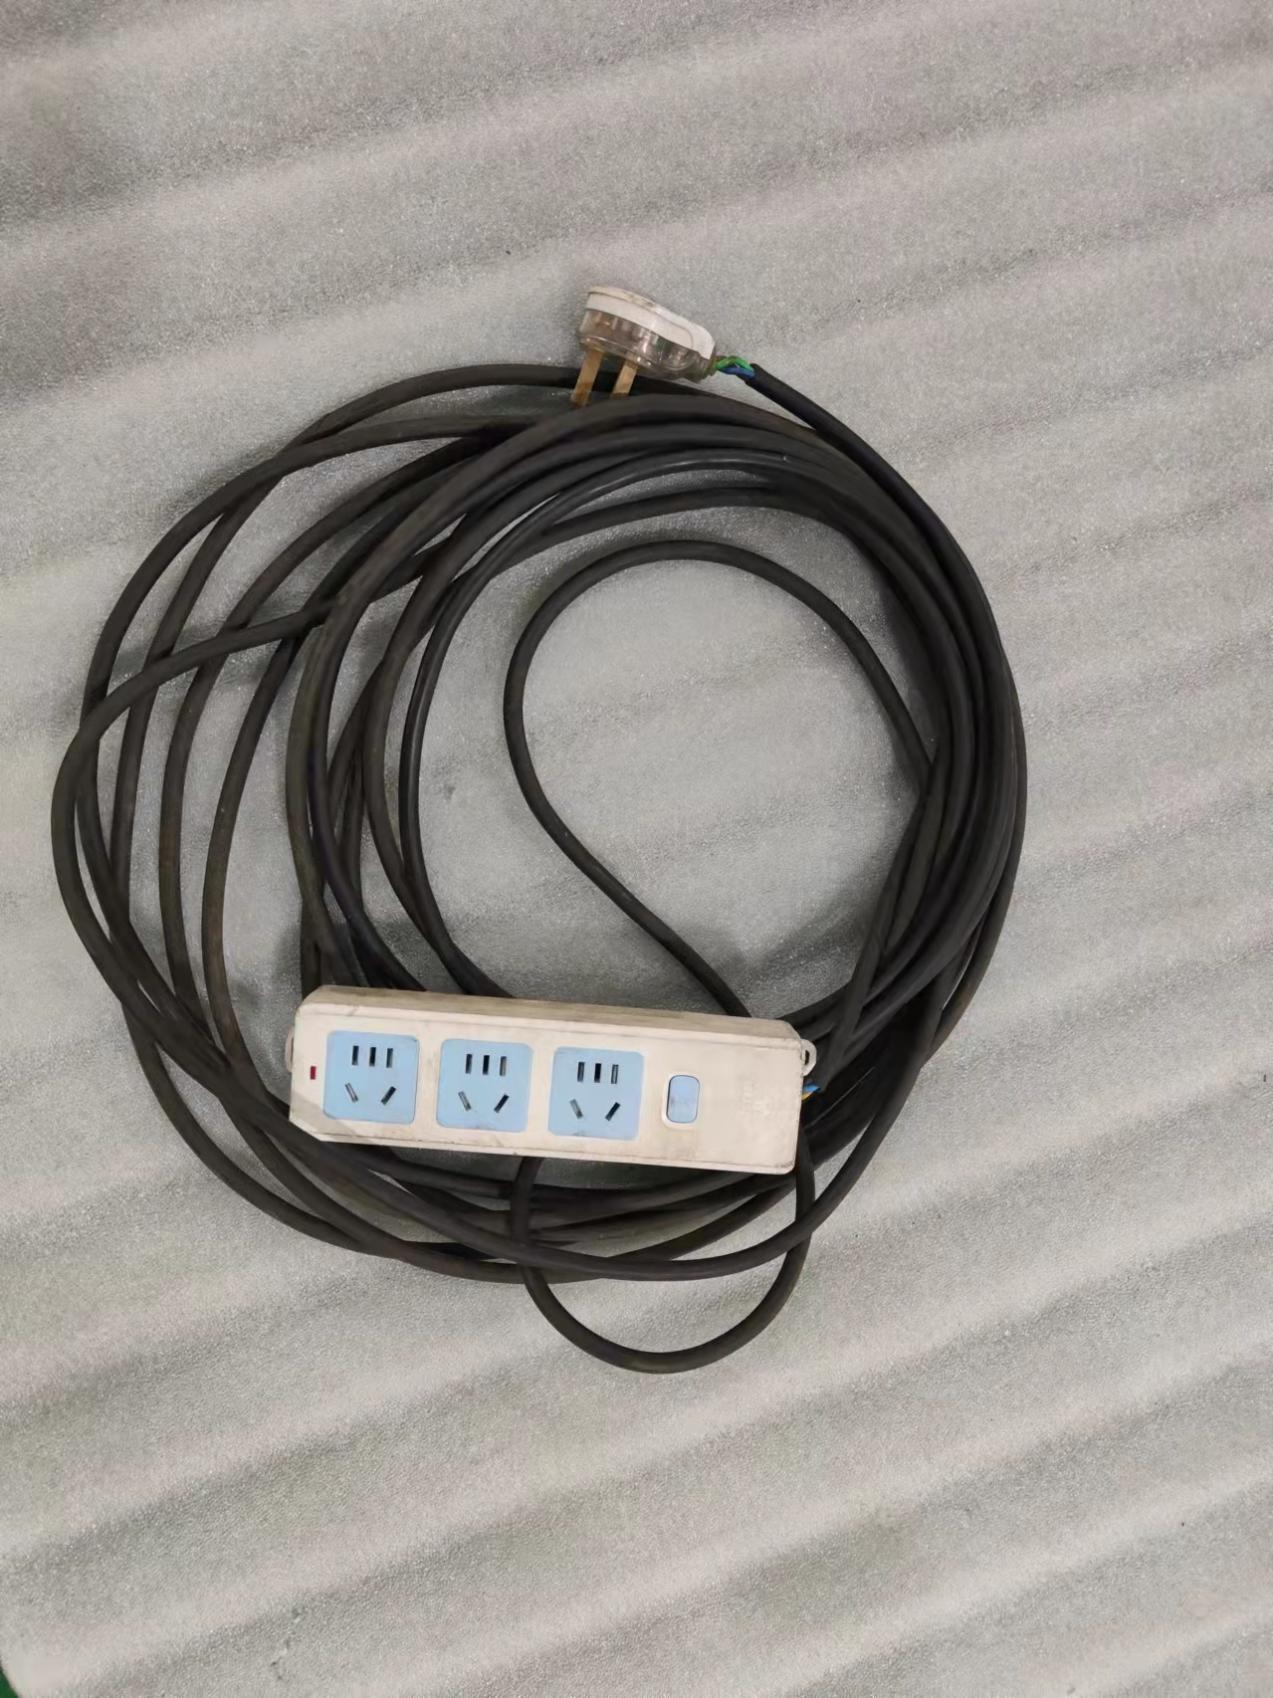
- For external power connections, use 2.5 square lines with proper grounding; insufficient voltage can impact the frequency converter.

8. Use 2.5 sq mm floor power lines
- Before operation, check transmission components for foreign materials. Remove any obstructions immediately, as forced operation can damage belts or power structures.

9. Check and clean transmission accessories
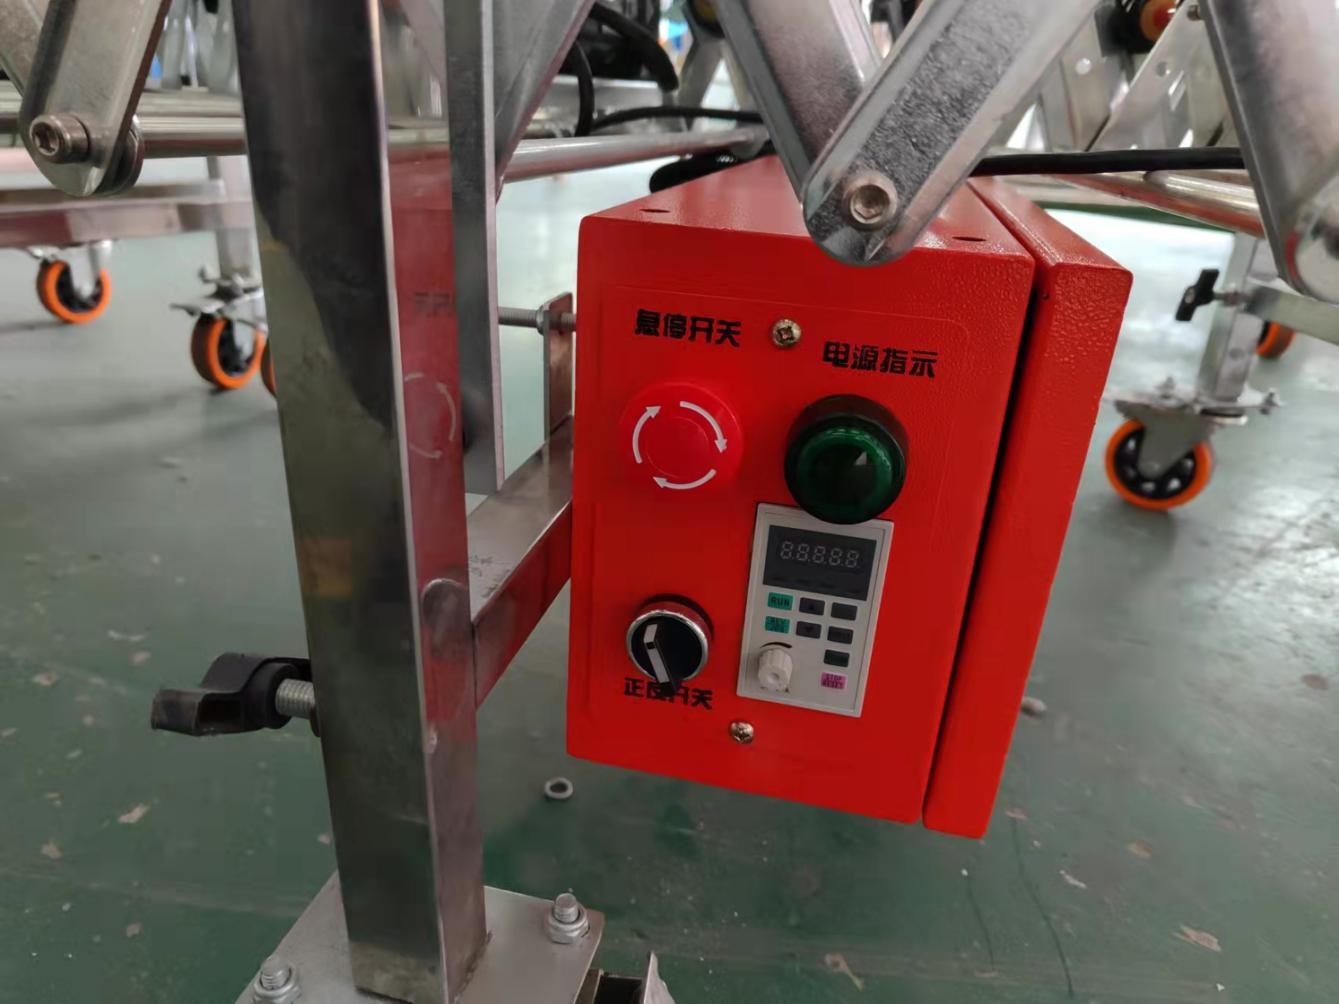
Electrical Systems and Control Box Operation
I: Power Requirements
- Install a voltage stabilizer in areas with unstable power supply
- For single-phase 220V systems, do not use 380V wiring; proper grounding must be established before operation
- Power cords must conform to appropriate standards and be of adequate gauge
II: Basic Operating Procedures and Wiring Diagram
- Before starting the machine, verify the following:Confirm power supply is properly connected
- (Electronic control boxes marked for single-phase require 220V, three-phase systems require 380V)
- Ensure proper grounding connection is established
- Startup procedure:Verify the emergency stop button is in the OFF position
- Select the appropriate operation direction using the forward/reverse switch
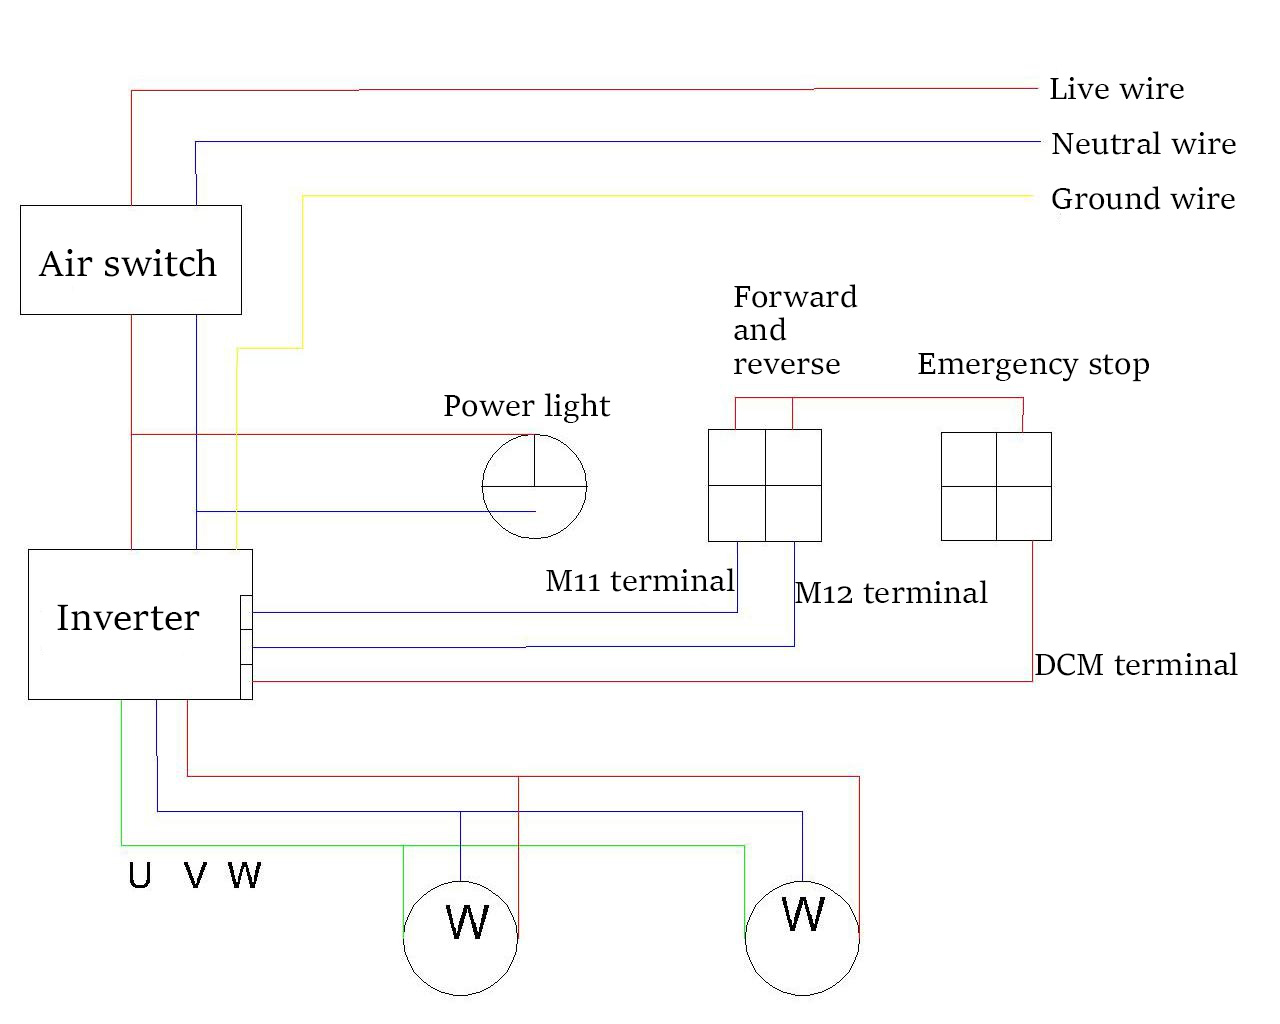
III: Troubleshooting Guide
- Power indicator light does not illuminate after connecting power:
- Check: Verify the power switch is turned on and power supply is correctly connected
- Indicator light is on but frequency panel remains off:
- Check: Ensure frequency converter input power and data lines are secure
- Diagnosis: When the frequency converter is powered on, listen for the internal cooling fan operation to confirm power supply
- Frequency converter runs normally but motor doesn’t turn:
- Investigation: Examine the transformer output lines (U, V, W) and fast connector cables
- Diagnosis: Look for disconnected wiring between components and the device
- Frequency converter displays fault code:
- Check: Inspect the transformer output starting lines (U, V, W)
- Diagnosis: Possible disconnected wires, wire collisions, or frequency converter failure
- Solution:Disconnect the control box from the equipment
- Power on the control box to verify independent functionality
- If issues persist, disconnect the three sets of lines from the frequency converter (U, V, W) and test again
- If problems continue, the frequency converter may need replacement
- If the frequency converter functions properly, investigate the wiring connections
- Motor makes sound but doesn’t turn:
- Diagnosis: A motor may have disconnected or broken wires
- Solution: Remove the motor wire box cover and inspect all connections
- Equipment has static or electrical leakage:
- Check: Verify external plugs have proper ground connections
- Check: Inspect all power lines for damage or leakage that could create electrical hazards